Copyright © 1998 Zegarelli International
All rights reserved
The First "OOD" Office Data Manager and Message-Conveyance
System!
1100 Allegheny Building
429 Forbes Avenue
Pittsburgh, PA 15219-1616 USA
Voice: 412-765-0490
Fax: 412-765-0531
http://www.zegarelli.com/ziata
Manual Version: 10/2/98 1:34 PM
This Manual is hypertext enabled. If you are reading this manual
in printed form, the underlining may be ambiguous: it may
be for emphasis or to indicate a hyperlink.
Important Publisher's Note:
You should read this Manual because Ziata! has "never before
seen" functionality.
Ziata! is very powerful, but it is "clean" in that the
functionality is always
available, but does not burden you with extraneous buttons, etc.
If you don't review the Manual, you might not grasp the power of
Ziata!
At least take a moment to review the various screen shots.
If you can only read one section, read Section
2.c.
Important installation
information is contained in Section 3.
Table
of Contents
Forward and Introduction
- Overview
- Modules and Dialogs
- General
- Password
- Pronexus™ Core Databases
- E-MSG! Module
- Client Management
- Office Management
- MindSaver™ Module
- MindSaver™ Docket Entry Properties
- MindSaver™ Docket Date Entry Properties
- MindSaver™ (Server Edition)
- Utilities
- Installation Information
- Getting
the Files
- First Time Run
- First Login
- Requirements, Compatibility
- Directory Structure
- Other Important Information Materials
- HOW DO I (do this or that)?
- Registration Information
The following symbols are used to assist you with
easily understanding the purpose of different instructions and statements
throughout this manual.
![]() A fundamental CONCEPTUAL fact.
This symbol indicates that the statement includes conceptual information that
regarding basic software functionality. For example, you may be doing the steps
to accomplish your goal properly, but the method you use to accomplish your
goal may be inefficient or unnecessary.
A fundamental CONCEPTUAL fact.
This symbol indicates that the statement includes conceptual information that
regarding basic software functionality. For example, you may be doing the steps
to accomplish your goal properly, but the method you use to accomplish your
goal may be inefficient or unnecessary.
![]() An
important KEY fact. This symbol indicates a basic piece of information that
you should know in order to properly use the software.
An
important KEY fact. This symbol indicates a basic piece of information that
you should know in order to properly use the software.
![]() A CAUTION fact. When you see
this symbol, stop and read it. It identifies information which, if not
understood, could cause problems using the software.
A CAUTION fact. When you see
this symbol, stop and read it. It identifies information which, if not
understood, could cause problems using the software.
![]() A TECHNICAL ISSUE. This indicates
a technical note, primarily intended for Network Administrators. Or, as is the
case in many offices, the Office/Department Manager who, to their chagrin, is
expected to be the Network Administrator.
A TECHNICAL ISSUE. This indicates
a technical note, primarily intended for Network Administrators. Or, as is the
case in many offices, the Office/Department Manager who, to their chagrin, is
expected to be the Network Administrator.
![]() A TIP. This might be a Windows tip or
Ziata! tip. Although not crucial to your use of the software, a tip is included
because it will make your use of the software more graceful.
A TIP. This might be a Windows tip or
Ziata! tip. Although not crucial to your use of the software, a tip is included
because it will make your use of the software more graceful.
Important
Terminology and Conventions
Forms and Dialog Boxes. At times, this manual refers to "forms" and
"dialog boxes." Forms and dialog boxes are similar. The difference is
that a form is usually a screen of information that you work in to perform a
certain function, like the E-MSG!® Pad. A dialog box is usually a small type of
form that solicits a particular item of information, such as a Yes or No
question. When the manual generally refers to a form, the reference
includes dialog boxes.
Movements: Movement through a
form and dialog box occurs by hitting the [tab] and [backtab] keys. (The [backtab] key is achieved by holding down the
[shift] key and hitting the key with the [tab] key (the key with arrows going
in opposite directions on the left side of the keyboard), i.e.
[shift-tab]). In some legacy (DOS) programs, movement occurs by hitting the
[enter] key. Not in Windows; except when closing a comboBox (see below), do not hit the [enter] key unless you
want to leave/close the form or for the reasons identified below
for Buttons.
Parts of Forms
and Dialog Boxes.
The dialog box below has a number of user selection and entry areas, called
"controls." Different controls have different names used in Microsoft
Windows95. With regard to the password dialog box below, following are the
names of the different controls and their functions:
Buttons. A
"button" is represented by the "OK" and "Cancel"
controls above. You can press a "focused" button by pressing the
[spaceBar]. This saves time because you don’t have to move the mouse to
click the button. A button has "focus" and can be "pressed"
if it has a faint stuttered line around the word inside the button. Neither of
the buttons above have focus. See the About Box (in Section 2, below) for an example of a button that
has focus and can be pressed by pressing the [spaceBar]. There can also be a
default button, which has a darker border than the other buttons, such as the
"OK" button above. Almost universally, regardless of where you are in
a form, pressing [enter] will cause the activity
underlying the default button to be performed, i.e. the same as pressing
the default button. Thus, in the dialog box above, if you were in the Password
field and hit [enter] the OK button would be performed, i.e. the form
would verify the password and close.
Tabs: The "tabbed control" allows
different screens of information to be displayed depending upon the tab
selected. The tabbed control above is represented by the following tabs: Entry,
Administration, Registration/Upgrade. Usually, different tabs are selected by
clicking on the desired tab with the mouse, but you can also select a tab by
hitting [tab] until the tab has focus, then pressing [enter].
Fields: A
"field" is usually the space within which you enter information.
Fields are represented by the white areas in the above dialog box. Fields
designate areas into which you can type information requested or required by
the program. Generally, fields colored white allow user input, fields colored
gray do not allow user input.
ComboBoxes:
A "comboBox," also known as a "drop-down comboBox" is a
type of field. It is special because you can usually type information into the
field, as well as get a drop-down list of available pre-defined entries.
Sometimes in a comboBox, you are not permitted to type in new
information, you must choose from the available selections in the list. A
comboBox is represented above by the field named "Company" with the
down-arrow on its left margin. Important: You can get the list by
clicking the arrow or by selecting [Alt-DownCursor]. Using
[Alt-DownCursor] allows very quick and easy data entry/selection.
Grids: A "grid"
contains a list of items, usually for the purpose of selection. In many cases,
typing the first letter of the item you intend to select, will automatically
scroll to that item.
Entities, Persons, Companies, etc. For ease of reference, we often use the following
terminology conventions: Entity could be either or both of: a human
being or a corporation. (I.e., human beings and companies are both
entities.) A Person or Human Being is a natural person. We try to
use "Person" when we can, but, sorry, sometimes we must use
"human being," rather than "person," so we don’t confuse
attorneys and accountants, who view a corporation as a "legal
person." Sometimes we use Company, which means not a human being,
but could be an estate, trust, corporation, etc. A User is a person who
is a user of Ziata! A Client is a client/customer/patient of the
business for which Ziata! is being used. All Users are also automatically
established as Clients (but, of course, all Clients are probably not Users).
Clipboard. Microsoft Windows95 has an inherent feature called
the "clipboard." The clipboard is a storage area of sorts. It allows
you to copy text from one program/form and paste it into another program/form.
Generally, you copy from a program with Ctrl-C and paste with Ctrl-P.
This is a very powerful feature in Ziata! because you can copy information, such
as full names and addresses, and paste the information into your wordprocessor,
for example.
Modules. Ziata! starts with the core Pronexus™ database engine. Each
"module" is like a separate software package that integrates with
Ziata!. For example, if you want the functionality supplied by E-MSG!®, you
obtain that module. If you need client/customer/patient management, you obtain
that module. In this way, you can obtain only the separate modules that support
your individualized business workflow.
In this manual, there are references to
certain third-party products, such as Novell Netware, Microsoft Windows95/NT,
Microsoft Exchange, Borland International, etc. There is no association or
relationship between such companies and Zegarelli International and/or Ziata!
Thus, the references contained in this manual are solely for the purpose of
identifying such companies and/or third-party products as it may relate to the
usability of the software. Ziata™, MindSaver™ and Pronexus™ are trademarks of
Zegarelli International. E-MSG!® is a federally registered trademark of
Zegarelli International.
Forward and Personal Introduction
Why do we have
this forward? In short, because Ziata! is just so powerful that we love
explaining what it does, and how it can really make your life easier. It’s a revolutionary,
not an evolutionary, business workflow product.
Ziata! is too
powerful to be called a personal information manager, has too much breadth to be
a database, and more depth than a telephone messaging system. We almost don’t
know how to categorize it!
So,
get a cup of your favorite java, have a seat and read on.
In short, Ziata! treats people, companies,
locations and telecommunication addresses as separate data objects. First, you
create the data object. Then, you give the data object properties (such as a
birthdate for a person object), then, you just connect and reuse the objects,
in any combination, without limitation. Now that the objects are entered once,
you’re set. Create once–use many. In fact, even the connections between
objects are objects.
For example, a husband and wife live at their
home with their five children. At that address, they have a home business,
which is incorporated. The husband is the president and a board of director
member, but not a shareholder. The wife is a shareholder, the secretary and
treasurer, and the other board member. Each of the five children is also a
shareholder. Okay, ask yourself. In order to track this information, how
many times do you have to enter the names, the location, the phone numbers, the
relationships? In Ziata!, you enter each only once, then connect them. Once
you connect the telephone number to the location, any person to whom you attach
the location inherits those telephone numbers. This is what we call
"data inheritance."
Re-use the Objects. Reusing the objects is really where it becomes
powerful. For example, after entering the husband, you can enter his birthday,
social security number, etc. Then, when you connect him to other corporations,
you’ve already got his personal information. Database professionals call this a
"highly normalized" database; business professionals call this
"no data redundancy"; you can just call it "effective."
No Limits. Also, most databases give you the opportunity to enter
up to 3 or so telephone numbers, etc. In Ziata!, it’s all unlimited.
There is no limit to how many telephones can be "attached" to people,
companies or locations; no limit on location attachments, etc. Even the
drop-down lists come from customizable text files. No limits!
Finding Data. Find data with just the click of the mouse. Let’s say
you know the name of a person, but can’t remember the company with which he or
she is affiliated. It’s easy. Lookup the name, and you’ll see all companies
with which he or she is affiliated. Better yet, look up a company, and you’ll
see all the employees, etc. Look up a telephone number, see all locations to
which it’s attached. It goes on and on. This is what we call our proprietary
Pronexus™ database engine. It’s outrageous. And, it’s all point and click.
We
almost hate to say it, but, that’s just the beginning.
E-Mail Messages. We took the Pronexus™ database logic and built upon
it. Another problem was taking phone messages, so we developed a message
pad that provides a front-end to the
data base. The phone message is then sent by the e-mail protocol on your
system. It makes the little e-mail phone pads distributed as shareware look
like a joke. The E-MSG!® Module lets a receptionist take phone messages,
suggests names from the database, then updates the database with new
information. And, the phone message pad itself is the best we’ve ever seen. It’s
live real-time data updating, as well as messages by e-mail!
Common Lookups. Okay, taking phone messages with the message pad is
cool, but what happens when more than one receptionist takes messages and sends
them via e-mail? If you call into the office, do you have to ask each receptionist
for your messages? (Presumably, your staff doesn’t have access to your email
file, so they wouldn’t know if another person took a message for you.) No.
E-MSG!® tracks every message taken by any user in a common database for lookup purposes.
In/Out Employee Tracking. In all businesses, staff are in and out of meetings.
The receptionist needs to track them. E-MSG!® does it, automatically. With In/Out, employees can sit at their desk and log themselves
in and out. When someone changes his or her in/out status, the receptionist is
automatically notified by a popup message. Also, in the E-MSG!® Pad, when the receptionist
takes a message, if that person is flagged as an exception (i.e., you
are not available, except for ...), then the receptionist will be automatically
notified with the waiting message form. For example, the receptionist can then put the caller
on hold and find the employee so he or she can take the call. Also, if multiple
employees have exceptions for the same potential caller, the receptionist can respond
to each employee separately with e-mail messages.
The key is that the receptionist does not
have to remember who is in, who is out, who are exceptions, etc.—finally,
it's all automated, for the first time, in history.
There’s
really so much more.
There’s client and file tracking, with e-mail
messaging when status changes. There’s scheduling of deadlines with automatic
e-mail notification (even to clients over the Internet), and resource logging.
Think about these great features:
![]() Create unlimited
persons, companies, locations, telecommunication information
Create unlimited
persons, companies, locations, telecommunication information
![]() Relate persons,
companies, locations, telecommunications without limits
Relate persons,
companies, locations, telecommunications without limits
![]() Prevent redundant
data entry
Prevent redundant
data entry
![]() Quickly find all
relations between or among the objects in any direction
Quickly find all
relations between or among the objects in any direction
![]() In each module,
easily edit the properties of the objects
In each module,
easily edit the properties of the objects
![]() Take phone messages
using e-mail
Take phone messages
using e-mail
![]() E-MSG!® Pad is
the database front-end, with automatic updating
E-MSG!® Pad is
the database front-end, with automatic updating
![]() In each e-mail
message, get full relationship history
In each e-mail
message, get full relationship history
![]() Each phone
message is logged in common database
Each phone
message is logged in common database
![]() Track staff
members as being in or out
Track staff
members as being in or out
![]() Create "find
me" in/out exceptions from the database
Create "find
me" in/out exceptions from the database
![]() When taking a
message, automatically notify receptionist that call is an exception
When taking a
message, automatically notify receptionist that call is an exception
![]() Deposit messages
for clients/customers that can be conveyed when they call
Deposit messages
for clients/customers that can be conveyed when they call
![]() Integrated
E-MSG!® Pad, In/Out and Waiting Messages Pad
Integrated
E-MSG!® Pad, In/Out and Waiting Messages Pad
![]() Use QuickEntry to
create objects and relationships
Use QuickEntry to
create objects and relationships
![]() Use QuickFinder
to quickly find locations, telephones, clients, etc.
Use QuickFinder
to quickly find locations, telephones, clients, etc.
![]() Track each piece
of postal mail in the office environment
Track each piece
of postal mail in the office environment
![]() Track the
location of each library book
Track the
location of each library book
![]() Create unlimited
clients/customers
Create unlimited
clients/customers
![]() For each client,
create files, subfiles and the documents contained therein
For each client,
create files, subfiles and the documents contained therein
![]() Log shared
resources so that common use is managed
Log shared
resources so that common use is managed
![]() Count days
between dates
Count days
between dates
![]() Send clients and
staff automated mail about upcoming deadlines
Send clients and
staff automated mail about upcoming deadlines
![]() Establish
unlimited to-do’s with MindSaver™
Establish
unlimited to-do’s with MindSaver™
![]() For each
MindSaver™ to-do entry, create unlimited associated dates
For each
MindSaver™ to-do entry, create unlimited associated dates
![]() Each MindSaver™
entry and each date has complete separate properties
Each MindSaver™
entry and each date has complete separate properties
![]() Use the Internet
to notify clients of deadlines, etc.
Use the Internet
to notify clients of deadlines, etc.
![]() MindSaver
automatically notifies staff that they have overdue books
MindSaver
automatically notifies staff that they have overdue books
![]() MindSaver automatically
notifies staff that they have overdue files/subfiles
MindSaver automatically
notifies staff that they have overdue files/subfiles
![]() MindSaver
automatically notifies you of birthdays and annual meetings
MindSaver
automatically notifies you of birthdays and annual meetings
![]() Perform mass
electronic mailings, with virtually no effort
Perform mass
electronic mailings, with virtually no effort
We are so confident with the product, that we
give an effective 30 day 100-user guarantee: use the software with up to 100
users; pay nothing for 30 days, if you like it, then, and only then, pay the
registration fee for the number of users and modules you specifically need.
Ziata! is a feature-rich product that has been
time-tested. Whether you use one or more modules, you’ll love it. We do.
We
really hope and expect that you will enjoy our product.
Gregg
Zegarelli
In Ziata, most of
the forms have a core menuing structure. That is, most of the menus in the
forms are the same, with variation only as necessary. The goal is to allow you
to develop habits that will increase the ease of use of the software. Following
is the core menu structure found in most of the forms:
File: E-MSG!®: E-MSG!® Pad
Lookup
In/Out
Waiting
Messages
Pronexus Module: People: Listing
New
Companies: Listing
New
Locations: Listing
New
Telecommunications: Listing
New
Reverse
Listing
Clients Module: Clients
Files
Mail
Logger
Subject
Codes
Office Module: Books
Mass
Mailings
Resource
Logger
Standard
Operating Procedures (SOPs)
MindSaver™
QuickEntry
QuickFinder
Configuration Defaults
Passwords/Administration/Registration
Utilities: Date Counter (Date Counter form)
Maintenance (Bug/Suggestion Reports)
Exit/Close (Exit
leaves Ziata, Close closes form)
View: Float (Form
floats on top of all others)
Last Saved (Use form size as
of last saved)
System Default (Use/reset to
manufacturer specs)
Small and Float (Make view very small
and float form)
Save Window on Exit (Save form size when exiting of
form)
Help: About
Distributor (Information
about Distributor)
About (Information
about software/version, etc.)
Menus are enabled
depending upon the modules that you licensed. For example, if you licensed the
E-MSG!® module, then the menu item is enabled, otherwise it is not enabled.
![]() Tip: Use the RIGHT-click mouse key
liberally. When moving over a section of a form, try clicking the RIGHT
mouse key for a context-sensitive menu. Try it in the In/Out form when the
cursor is over the Exceptions area. In some cases, you must right-click
for menus.
Tip: Use the RIGHT-click mouse key
liberally. When moving over a section of a form, try clicking the RIGHT
mouse key for a context-sensitive menu. Try it in the In/Out form when the
cursor is over the Exceptions area. In some cases, you must right-click
for menus.
The following speed
keys have consistent purposes throughout the program for ease of reference. If
the form or dialog box does not have the function, the speed key will not
operate. These keys are purposely intuitive, and the speed keys are often
similar to the alt-key sequences.
![]() Tip: Use Speed Keys and Alt-Letter
sequences. Using the mouse is slow. Get in the habit of using the
speed keys and the Alt-key sequences. I.e. tapping the Alt key
once (which enables the menu), then the first letter of each menu selection can
become very fast. The underlined letter key in the menu indicates the letter to
hit to select that menu option. E.g. tapping Alt-F-Y, launches the Quick
Entry form, as does Ctrl-Y, either of which is faster than using your mouse to
scroll through the menus!
Tip: Use Speed Keys and Alt-Letter
sequences. Using the mouse is slow. Get in the habit of using the
speed keys and the Alt-key sequences. I.e. tapping the Alt key
once (which enables the menu), then the first letter of each menu selection can
become very fast. The underlined letter key in the menu indicates the letter to
hit to select that menu option. E.g. tapping Alt-F-Y, launches the Quick
Entry form, as does Ctrl-Y, either of which is faster than using your mouse to
scroll through the menus!
* and bolding mean an important
speed key, which you should remember.
Ctrl-A: Apply*
Ctrl-B: Books form
Ctrl-C: Companies
Ctrl-D: Phone Dialup form*
Ctrl-E: E-MSG! Pad form*
Ctrl-F: Float form
Ctrl-G: Resource Logger form*
Ctrl-H: Refresh Data
Ctrl-I: In/Out form*
Ctrl-J: Subject Codes
Ctrl-K: E-MSG! Lookup form or
Quick MindSaver, depending
Ctrl-L: Locations
Ctrl-M: Menu On/Off Toggle*
Ctrl-N: Date Counter form
Ctrl-O: Properties for the Relation
form*
Ctrl-P: People
Ctrl-Q: Quick Finder form*
Ctrl-R: Properties form*
Ctrl-S: Clients
Ctrl-T: Telecommunications
Ctrl-U: Users
Ctrl-V: MindSaver™ form
Ctrl-W: Waiting Messages form
Ctrl-X: Mail/Fax Logger form
Ctrl-Y: Quick Entry form*
Ctrl-Z: SOPz (Standard Operating
Procedures)
Ctrl-F12: Maintenance
Ctrl-Backspace Cancel Filter/Show All
Ctrl-Del: Delete
Shift-Del: Delete Relation
Ctrl-Ins: New
Shift-Ins: New Relation
- General
The Main Form
defaults to full screen mode, but by selecting [Alt-View-Small and Float],
or [Alt-F] the program will sit nicely on top of all other programs. We
suggest that you operate Ziata! in Small and Float Mode. When you select Small
and Float, the form will be located at the upper right hand corner of your
screen, but you can move it to a better location so that you can get to it
easily. All of the menus and speed keys remain active!
![]()
![]() Tip: Move a form by the click-and-drag method.
If you want to move a form, just left-click on the titlebar and hold
(left button down) and drag the titlebar to the new location.
Tip: Move a form by the click-and-drag method.
If you want to move a form, just left-click on the titlebar and hold
(left button down) and drag the titlebar to the new location.
In
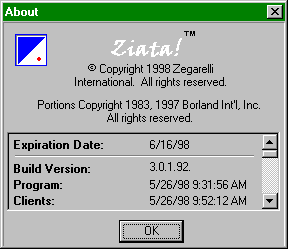
Ziata!, the About Box contains information about the version of the program.
The About Box is obtained by selecting [Alt-Help-About]. By scrolling
down, you will get additional information that may be necessary if you are a
registered user and you call for support.
Ziata!
is distributed using distributors and value-added resellers (VARs). Information
about the VAR that distributed your version is contained in the About
Distributor Box. The About Distributor Box is obtained by [Alt-Help-About
Distributor]. If you are interested in becoming a VAR, see Distributor/Reseller Information below.
Your
first point of support is the VAR, so you should first call or e-mail the VAR
with specific support questions. Only if your VAR is not responsive to you
should you contact Zegarelli International.
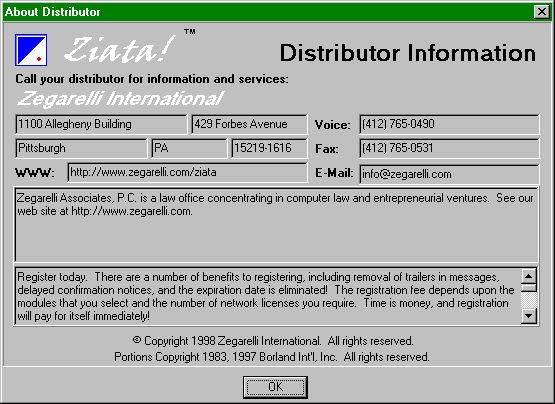
![]() Tip: Many sections are resizable, as are many
forms. If you move the cursor slowly over the edge of a form, you may
notice that the cursor changes shape. If it changes shape you can left-click
and hold to resize the form. The same is true for "panels" within a
form. For example, the raised horizontal bar that separates the two sunken
windows above (one window starts "Zegarelli" and the other starts "Register")
can be moved up and down to change the relative size of the two windows. This
is true throughout Ziata!, but you must look around to determine where!
Tip: Many sections are resizable, as are many
forms. If you move the cursor slowly over the edge of a form, you may
notice that the cursor changes shape. If it changes shape you can left-click
and hold to resize the form. The same is true for "panels" within a
form. For example, the raised horizontal bar that separates the two sunken
windows above (one window starts "Zegarelli" and the other starts "Register")
can be moved up and down to change the relative size of the two windows. This
is true throughout Ziata!, but you must look around to determine where!
Usually,
the location of the database files, i.e. the "directory
structure," is established upon installation. (The directory structure
is specified in the Ziata! ".ini file," pronounced, "inny
file.") See Directory Structure. However, the directory
structure can later be changed in the Configuration form below, which can be
obtained at Alt-File-Configuration-Defaults.
![]() Technical
Note: .INI Files.
References to the ".ini" file denotes an "initialization"
file in the Windows/NT Root Directory, which directory is almost always
"c:\windows" or c:\winnt[version], respectively. For example, the
Ziata! .ini file is Ziata.ini. That file contains important information about
the program defaults and setup. You can manually view and edit the .ini file
(though we don’t recommend it) by clicking the Windows95 Start button, Run,
then type in "Ziata.ini" (without quotes).
Technical
Note: .INI Files.
References to the ".ini" file denotes an "initialization"
file in the Windows/NT Root Directory, which directory is almost always
"c:\windows" or c:\winnt[version], respectively. For example, the
Ziata! .ini file is Ziata.ini. That file contains important information about
the program defaults and setup. You can manually view and edit the .ini file
(though we don’t recommend it) by clicking the Windows95 Start button, Run,
then type in "Ziata.ini" (without quotes).
![]() Key: Administration
Tab. During First Time Run, an Administrator of the software is identified. In many forms, there
is a tab called "Administration" which is hidden by default. However,
if the user is the Administrator, then the tab is shown. You can determine if
you are the Administrator in the About Box, which will say "Administrator!" next to
the login name. There is only one Administrator per installation.
Key: Administration
Tab. During First Time Run, an Administrator of the software is identified. In many forms, there
is a tab called "Administration" which is hidden by default. However,
if the user is the Administrator, then the tab is shown. You can determine if
you are the Administrator in the About Box, which will say "Administrator!" next to
the login name. There is only one Administrator per installation.
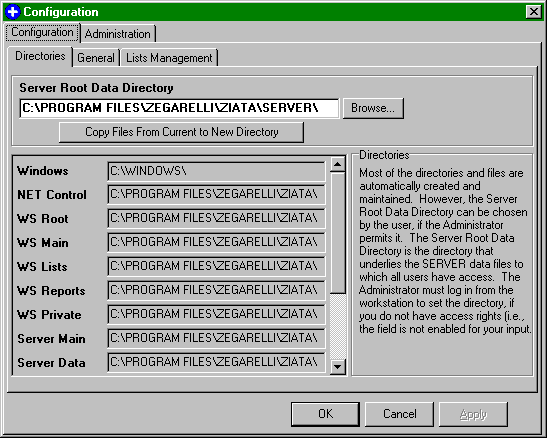
Directories:
The
following identifies all directories being used by the program. This
information is usually derived from the workstation’s .ini file. However, see below for the way an Administrator can force certain directories
onto a user regardless of what directories are identified in the user’s .ini
file. If
there’s too much information in a field, click or tab into that field and
cursor to the right to see the remainder of the information.
General
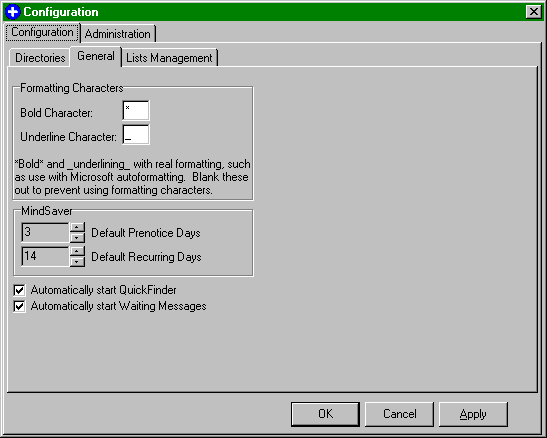
Configuration:
The
information within the Configuration tab allows all users to establish
certain personal general defaults.
Formatting
Characters.
Formatting Characters are interpreted by many mail programs to start and end
formatting. For example, use of the asterisk ("*") as the bold
character will cause certain highlighted information to be wrapped with
asterisks, e.g. *This text is bolded.* Then, a program, such as
Microsoft Exchange using WordMail formatting, will format the text in bold and
remove the asterisks. This makes reading mail much easier. If your mail
program does not support formatting characters, you can blank them out. See
the example of formatted mail resulting from the E-MSG!® Pad (See
2.g.iii).
Lists:
![]() Key: Lists. There are lists that exist on
the server and are used universally by all users. There are also lists on the
workstation that each user can individually maintain with personalized
information. The lists within the Configuration tab are each user’s personalized
lists; those within the Administration tab are the universal lists. When
various form load, they merge the server lists with the workstation lists for a
combined set of server and workstation lists. See
the directory structure for locations
of the text files.
Key: Lists. There are lists that exist on
the server and are used universally by all users. There are also lists on the
workstation that each user can individually maintain with personalized
information. The lists within the Configuration tab are each user’s personalized
lists; those within the Administration tab are the universal lists. When
various form load, they merge the server lists with the workstation lists for a
combined set of server and workstation lists. See
the directory structure for locations
of the text files.
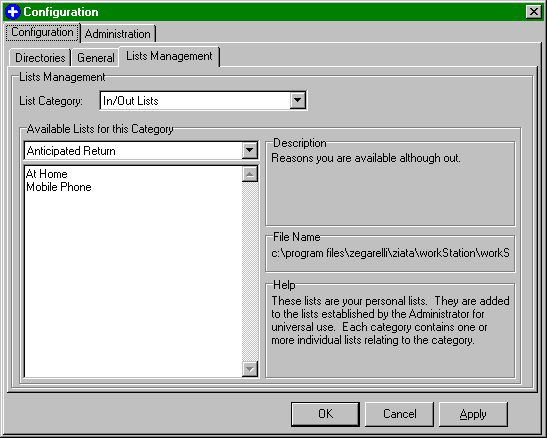
Most
of the comboBoxes used by Ziata! obtain the lists from standard text (.txt)
files. Each user's personal preferences are edited at the screen below.
Administration:
Only
the Administrator has access to the Administration tab.
The
Server Root Directory is established upon installation. By default, all
databases are subdivided under the Server Root Directory. Usually, users
should NOT be able to easily change
the Server Root directory. Check the box
identified in the figure below to allow users to change the Server Root
Directory in the Directories tab of Configuration dialog below. (Users can
always manually edit their .ini file to change the directory structure.)
![]() Technical
Note: Root Directories. A "root directory" merely means the
"top" directory within the context of its reference. For example, the
root directory in the context of the C: drive is c:\ because there are no
higher directories, although there may be many subdirectories. The root
directory in the context of Windows95 is usually C:\windows, because all of the
Windows95 files are contained in this directory or its subdirectories. Ziata!
initially creates its root directory as c:\program files\zegarelli\Ziata. Two
subdirectories are also created: "Server" and
"Workstation." All server files are in subdirectories under the
server directory, and all workstation files are in subdirectories under the
workstation directory. Therefore, the Ziata! Server Root Directory is
usually c:\program files\zegarelli\Ziata\server. The Ziata! Workstation
Root Directory is usually c:\program files\zegarelli\Ziata\workstation. The
Server Root Directory is copied to the server network drive upon a server
installation. It is important to keep the Server Root Directory intact, i.e.
not moving subdirectories out of the Server Root Directory, for ease of
directory management. See Directory Structure for details.
Technical
Note: Root Directories. A "root directory" merely means the
"top" directory within the context of its reference. For example, the
root directory in the context of the C: drive is c:\ because there are no
higher directories, although there may be many subdirectories. The root
directory in the context of Windows95 is usually C:\windows, because all of the
Windows95 files are contained in this directory or its subdirectories. Ziata!
initially creates its root directory as c:\program files\zegarelli\Ziata. Two
subdirectories are also created: "Server" and
"Workstation." All server files are in subdirectories under the
server directory, and all workstation files are in subdirectories under the
workstation directory. Therefore, the Ziata! Server Root Directory is
usually c:\program files\zegarelli\Ziata\server. The Ziata! Workstation
Root Directory is usually c:\program files\zegarelli\Ziata\workstation. The
Server Root Directory is copied to the server network drive upon a server
installation. It is important to keep the Server Root Directory intact, i.e.
not moving subdirectories out of the Server Root Directory, for ease of
directory management. See Directory Structure for details.
Over time, your
database of information will become extremely valuable. Creating a Security
Key in a directory allows an administrator to create and/or hide any file
on the network, which must exist or the program will not run. If an employee,
etc., copies (steals) the software and the databases, the software will not
operate without the Security Key file. We suggest using a Security Key file.

Ziata!
subdivides databases into different directories to provide flexibility to the
Administrator is establishing network rights. See Directory Structure for more information. Flexibility means
power, at the cost of potential errors and misconfiguration. By default, the
software obtains all directories from the Ziata! .ini file. However, certain,
BUT NOT ALL, of those directories can be overridden by the Administrator, i.e.
forced upon the users, by using Directory Overrides. Directory Overrides can
simplify directory administration.
![]() Technical
Note: Directories You Cannot Override. No matter what, the Network
Control and Server Main directories are obtained locally from the .ini
file of each workstation and cannot be overridden. The other directories can be
forced upon the users. If a directory is not identified here for an override,
then the workstation uses the directories found in its local .ini file. Why
can’t you force all directories onto the users? Because the locally
operating software must at least know where to look for the database that
contains the centralized information of the other data that will be forced upon
it! The Network Control directory indicates where the network control file is, and, as you might expect, must be accurate
prior to initialization of the databases. The network control file is used by
the database to track user access to prevent data corruption. There is more
information about the network control file in First Time Run. The Server Main directory contains the
databases that contain the information to be forced upon the users. (We
recommend keeping the Server Root Directory structure intact for ease of future
administration, such as moving all databases automatically, but, technically,
if the Administrator knows what he or she is doing, it can be modified.) After
the Administrator's system is established, her or she can conveniently put his
or her working directories into the fields by clicking the button below.
Technical
Note: Directories You Cannot Override. No matter what, the Network
Control and Server Main directories are obtained locally from the .ini
file of each workstation and cannot be overridden. The other directories can be
forced upon the users. If a directory is not identified here for an override,
then the workstation uses the directories found in its local .ini file. Why
can’t you force all directories onto the users? Because the locally
operating software must at least know where to look for the database that
contains the centralized information of the other data that will be forced upon
it! The Network Control directory indicates where the network control file is, and, as you might expect, must be accurate
prior to initialization of the databases. The network control file is used by
the database to track user access to prevent data corruption. There is more
information about the network control file in First Time Run. The Server Main directory contains the
databases that contain the information to be forced upon the users. (We
recommend keeping the Server Root Directory structure intact for ease of future
administration, such as moving all databases automatically, but, technically,
if the Administrator knows what he or she is doing, it can be modified.) After
the Administrator's system is established, her or she can conveniently put his
or her working directories into the fields by clicking the button below.

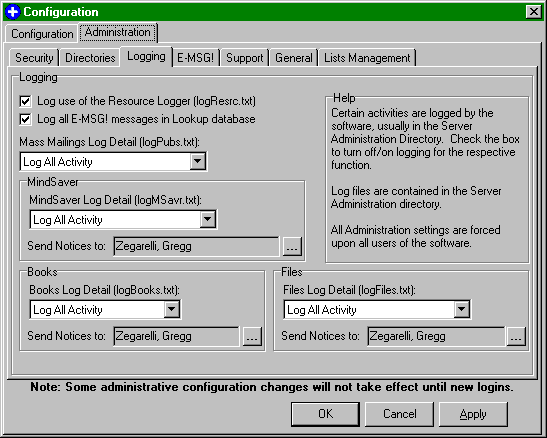
Certain user
activities are logged by the software, usually in the Server Administration
Directory. Check the box to turn off/on logging for the respective function.
The list of logging functions should be continually updated with each release,
so your screen may have additional checkboxes.
For example, in the
checked item below, each time a user uses the Resource
Logger details of the use (such as
username, date time, etc.) will be logged in the file "logResrc.txt"
in the Server Administration Directory. The Administrator may review the log
file to evaluate the details of use.
When taking
messages in the E-MSG!® Pad, you can log all messages in a common lookup
database. Check the box to do so.
For example, each
telephone message taken and sent by electronic mail is stored in a centralized
database. This is important because: in most environments, users do not have
access to each other’s e-mail password, if there are multiple receptionists and
you call in from out of the office, any receptionist can check all messages
taken from any other receptionist in the centralized Lookup database. Otherwise, the second receptionist would
not be able to determine messages taken by the first receptionist, because he
or she does not have password access to the other receptionist’s or the recipient's
e-mail file.
In addition, in the
E-MSG!® Pad, you can create up to six user-defined check boxes, which are shown
on the Additional tab in the E-MSG!® Pad. For conformity purposes, all
Administration settings are universally applied to all users of the software.

We
appreciate your helpful suggestions and observations. Accordingly, Ziata! has the
ability at [Alt-File-Utilities-Maintenance], or Alt-F12, to log
bugs and improvement notices. A database is maintained of all comments by all
users on your network. The Administrator or your VAR can review this database
for valuable information during their network administration activities, and
future versions of the software may contain functionality to transmit the
database. Currently, the software logs all improvement/bug notices in the
database, and sends an e-mail message to either of, or all of, the
Manufacturer, Distributor (VAR) and/or your network Administrator. If you use
centralized bug notice information, for conformity, the choices are forced upon
the users. If there is no centralized bug notice information, then each user
can establish their own preferences on an individualized basis. If your e-mail
package can send via the Internet, then those addresses are also valid.
Otherwise, you should use the Default E-mail Address.

General:
Ziata!
uses certain naming conventions throughout the program. The Adminstrator can
establish company-wide naming conventions. For example, in a doctor's office,
"Customer" would be called "Patient." Every client can have
up to three responsible parties. The MindSaver Disclaimer footer is appended to
every MindSaver notice. (Note the "*" which is an auto-formatting character
used by WordMail to format messages.) MindSaver entries have a special
user-defined flag. For example, in a law office, MindSavers might be flagged as
"Litigation" or in a doctor's office as "Surgery Required."
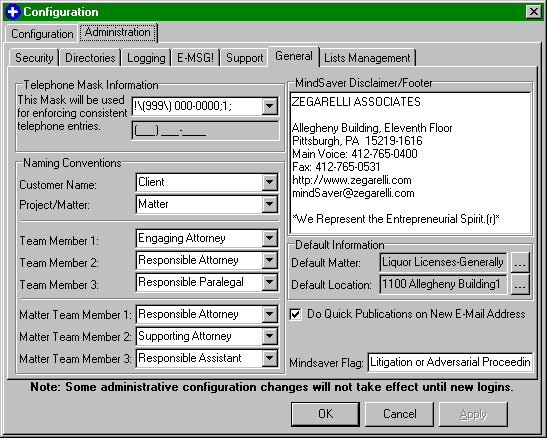
Team
members can be established for each customer as well as each project for a
customer. See Clients/Customers Files, below at Section 2.e.i.
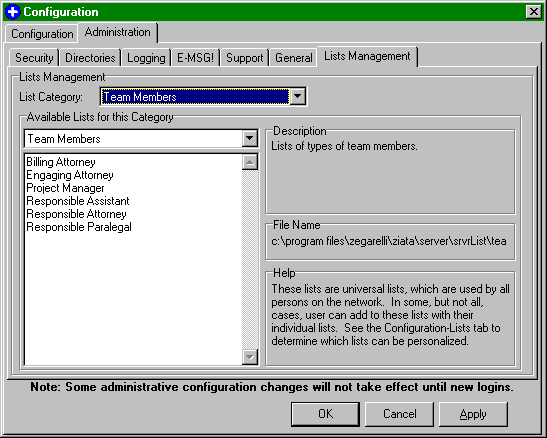
Lists:
The
Administrator has the ability to edit the lists available in the comboBoxes by
editing the text files directly, using the Microsoft Notepad, for example. The
Administrator can also easily edit the text files from the Configuration form.
When you run
Ziata!, you will be prompted for your nickname and password. (The only
exception is the first time you run Ziata! following a first-time installation,
at which time you will first be prompted for certain preliminary information.
See Installation.)
You will note below
the Administration and Registration tabs: these tabs do not appear until you
log in. Following your login, all users will also have the Registration tab;
only the Administrator will have the Administration tab. After your login, you
can get back to the password dialog box at the Main form at [Alt-Configuration-Password].
![]() Technical
Note: Logging in Again After Login. From the Password dialog box,
Ziata! allows you to change your login to a new name; however, if you do so,
your previous login will not be logged out properly. You should not re-login if another user already logged into the system with
the same user name. If you duplicate a login name, Ziata! will indicate that
there is a license violation.
Technical
Note: Logging in Again After Login. From the Password dialog box,
Ziata! allows you to change your login to a new name; however, if you do so,
your previous login will not be logged out properly. You should not re-login if another user already logged into the system with
the same user name. If you duplicate a login name, Ziata! will indicate that
there is a license violation.

You
can type the first letter to scroll down the list. Hit [tab] to move to enter
the password. The up/down arrows continue to work in the Password field. The OK
button is the default button, so hitting the [enter] key will fire the OK
button. In the Password dialog box, nicknames are used, not full names.
![]() Key: Nicknames. Each entity (a person or a company) has a
nickname. This will default to the first 25 characters of the entity’s full
name. You can edit the nickname in the properties for the entity. Nicknames
for companies are less important, but nicknames for persons who are also
users is very important. We suggest standardizing on user initials, but
some small companies use first names or Internet identifications.
Key: Nicknames. Each entity (a person or a company) has a
nickname. This will default to the first 25 characters of the entity’s full
name. You can edit the nickname in the properties for the entity. Nicknames
for companies are less important, but nicknames for persons who are also
users is very important. We suggest standardizing on user initials, but
some small companies use first names or Internet identifications.
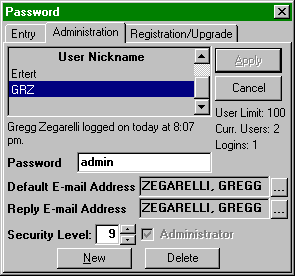
After
login, the Administrator will have access to the Administration tab. The list
shows all current users, login information, etc.
![]() Technical Note:
Display of Passwords. The password
is displayed when you click onto the Administration tab. Thus, be careful if
other persons are in the viewing area.
Technical Note:
Display of Passwords. The password
is displayed when you click onto the Administration tab. Thus, be careful if
other persons are in the viewing area.
To
setup a new user, click the New button, or right-click over the listing. You
will be presented with the listing of all persons in the database. If the user you
intend to establish is not yet in the database, then select New when presented
with the person list and you can enter a new person into the database. When the
person exists that you intend to be the user, select OK from the person
listing. If you want to edit the person’s nickname or data, just right-click to
Edit. Note: When creating a new data object, the properties box will display.
For
each new user, you need:
1. Password. Just type one in.
It’s case sensitive; we suggest all lower case, unless you need more than the
usual security.
2. Default E-mail Address.
Every user needs a Default E-mail Address. Ziata! uses your office
e-mail protocol to send messages about what’s going on in the data system. If
you use an intranet, you can specify an Internet address. If you are using
Microsoft Exchange, then you should enter the Default E-mail Address exactly
the same as your name exists in the postoffice. For example, below you will
note that Zegarelli, Gregg R. is entered. This is because, in our Exchange network
postoffice, the user name is entered exactly that way. (The Default E-mail
Address can also be edited in the properties box.)
The
Reply E-mail Address is used for one purpose: the MindSaver module sends
notices to customers over the Internet. If a user's Default E-Mail Address is
an internal network address, rather than an Internet Address, then the
recipient of Internet mail will not be able to reply. The Reply E-Mail Address
allows you to establish an internal network address for the Default E-Mail
Address, but to use an Internet Address for replies. This only applies to
MindSaver notices, not to all notices.
When
Ziata! sends e-mail notices, it uses exactly the Default E-mail Address to
address mail.
![]() Key: Network Addresses, Internet Addresses,
Telephone Numbers are all contained in the Telecommunications database.
Thus, when you need to obtain a Default E-mail Address, or otherwise relate an
Internet Address or Telephone Number, you need to get it from the
Telecommunications Listing, and if it doesn’t exist, you need to create it by
clicking [New] at that listing. By default, there is a "( ) - " entry
mask to help assure that telephone numbers are entered accurately, e.g.,
"412-765-0490" will be automatically wrapped in "(412)
765-0490". The Administrator can change the mask for foreign countries in
Configuration. To enter an Internet or other address which does not follow
that format, check-off the Mask checkbox. See Electronic Notifications for more information.
Key: Network Addresses, Internet Addresses,
Telephone Numbers are all contained in the Telecommunications database.
Thus, when you need to obtain a Default E-mail Address, or otherwise relate an
Internet Address or Telephone Number, you need to get it from the
Telecommunications Listing, and if it doesn’t exist, you need to create it by
clicking [New] at that listing. By default, there is a "( ) - " entry
mask to help assure that telephone numbers are entered accurately, e.g.,
"412-765-0490" will be automatically wrapped in "(412)
765-0490". The Administrator can change the mask for foreign countries in
Configuration. To enter an Internet or other address which does not follow
that format, check-off the Mask checkbox. See Electronic Notifications for more information.
![]() Caution. The
Ziata! workflow concept is founded upon e-mail notifications. The correct
Default E-mail Address is fundamental to the operation of the system. If you
don’t get it right, the system will not function properly.
Caution. The
Ziata! workflow concept is founded upon e-mail notifications. The correct
Default E-mail Address is fundamental to the operation of the system. If you
don’t get it right, the system will not function properly.
3. Security Level. The
Administrator flag is determined on the installation of Ziata! The Administrator should remain at 9, but
many functions give full access to the person identified as Administrator
regardless of the Administrator's security level. There are security levels
from 1 to 9. See Configuration for details on issues relating to security. A
security level of six (6) and above have special rights to view information.
![]() Key: Two persons cannot be simultaneously logged in with the same
User Name. When the second person attempts to log in under the name of
someone who is already logged in, Ziata! will inform the second user whether
the first other apparent user should be logged out. If the second user logs
out, the first user’s login will be superseded and the first user will start to
receive an error message every 15 seconds. The solution, of course, is to
upgrade the number of network licenses. This will also occur if there was a
system crash where a user did not log out properly, but, in that case, it’s
okay to eliminate the first login because there’s no other actual user.
Key: Two persons cannot be simultaneously logged in with the same
User Name. When the second person attempts to log in under the name of
someone who is already logged in, Ziata! will inform the second user whether
the first other apparent user should be logged out. If the second user logs
out, the first user’s login will be superseded and the first user will start to
receive an error message every 15 seconds. The solution, of course, is to
upgrade the number of network licenses. This will also occur if there was a
system crash where a user did not log out properly, but, in that case, it’s
okay to eliminate the first login because there’s no other actual user.
- Registration/Upgrade
Registration and
upgrading occurs via the Password dialog box. See details on Registration below.

- Pronexus™ Core Databases
- QuickFinder™ (Ctrl-Q)
QuickFinder™ is the
core of the Pronexus™ database engine. You can launch QuickFinder™ by hitting [Ctrl-Q].
You will note two primary internal windows: the top window shows the primary
searched term (the "Search Window"). The bottom window is the
related entities (the "Relations Window"). You can tab between
them for speed. Just type in the name (last name first for persons). Persons
and companies are listed together in alphabetical order.
Search on a
company’s name, and see all employees, subsidiaries, etc. Search on a person’s
name, and see all of their employers, family, etc.
To search on a
term, just start typing it and QuickFinder™ will automatically start searching
for it. In accordance with Windows conventions, the search term lasts 2 seconds
and then clears. If you want to see the search term, place the cursor over the
Search Window.
![]() Tip: Don’t forget that you can resize the
panels and use the speed keys. The System Default size has been
determined to be excellent based upon our research. Also, you should remember
the [Ctrl-D] for Dialup, and [Ctrl-R] for Properties.
Tip: Don’t forget that you can resize the
panels and use the speed keys. The System Default size has been
determined to be excellent based upon our research. Also, you should remember
the [Ctrl-D] for Dialup, and [Ctrl-R] for Properties.

![]() Key: Double-clicking. Double-click on a
name in the Search Window and Dialup will be launched. Double-click on a name in the
Relations Window and QuickFinder will flip the search and search for that name
in the Search Window.
Key: Double-clicking. Double-click on a
name in the Search Window and Dialup will be launched. Double-click on a name in the
Relations Window and QuickFinder will flip the search and search for that name
in the Search Window.
![]() Double-clicking in the
Relations Window is fundamental to the basic concept of Ziata! This is how data
redundancy is eliminated. For example, you don’t need to enter a
"company" mailing address for an individual. You first find the person,
double-click on the company name in the relations window, then hit [Ctrl-D] for
Dialup.
Double-clicking in the
Relations Window is fundamental to the basic concept of Ziata! This is how data
redundancy is eliminated. For example, you don’t need to enter a
"company" mailing address for an individual. You first find the person,
double-click on the company name in the relations window, then hit [Ctrl-D] for
Dialup.
![]()
![]()
![]()
![]()
![]()
Get the message that the following is important?
The Pronexus™ database engine is based upon the
following premise:
People are
objects;
Companies are
objects;
Locations are
objects;
Telecommunication
Addresses are objects; and
Even the
relationships between and among them are separate objects.
Then connect them.
But THINK first. Connecting people and companies is easy enough. But don’t get
confused with telephones. A telephone number should normally not be attached
(or related) to a person; it should be attached to a location. Okay, the
exceptions: Internet addresses and cellular phones, which are related directly
to a person, and not to a location. A bit of an anomoly is a personal extension
at work, which should be attached directly to the individual. QuickEntry™ automatically does the connections for you by
default.
Consider this
example:
Gregg R. Zegarelli
President
Zegarelli
International
1100 Allegheny
Building, 429 Forbes Avenue
Pittsburgh, PA
15219-1616, USA
Voice: 412-765-0490
Fax: 41-765-0531
Website Address: http://www.zegarelli.com/ziata
Personal E-mail: support@zegarelli.com
Company E-mail: info@zegarelli.com
Gregg R.
Zegarelli is entered as a person object
Zegarelli
International is entered as a company object
1100 Allegheny
Building is entered as a location object
The Voice, Fax,
Website, Personal E-mail and Company E-Mail are separately entered as separate
telecommunication objects
Now that the basic
objects are entered, connect them:
Gregg R.
Zegarelli is related to Zegarelli International, with a relationship called
"President"
1100 Allegheny Building
is related to Zegarelli International, with a relationship called "Main
Office"
412-765-0490 is
related to 1100 Allegheny Building, with a relationship called "Voice
Number," as is 412-765-0531 with a relationship called "Fax
Number"
http://www.zegarelli.com/ziata is related directly to Zegarelli International, with
a relationship called "Website," as is info@zegarelli.com,
with a relationship called "E-Mail Address"
support@zegarelli.com is related directly to Gregg R. Zegarelli, with a
relationship called "E-Mail Address"
You don’t need
to relate Gregg R. Zegarelli to the 1100 address because QuickFinder™ allows
such fast searching of the inter-connections between Gregg R. Zegarelli and
Zegarelli International. When you understand the concept, you’ll have a lean,
mean database machine.
Some new users
have a tendency to over-relate, because traditional databases make you enter so
much redundant data. Think and avoid this tendency! For the techies,
this is why Pronexus™ is a "highly normalized" database. Remember, we
built QuickEntry™ to do this automatically for you.
Next time you attach
the location to another object, the object will inherit the existing
relationships of the location! Cool, eh?
QuickFinder also
displays all Locations, Telecommunication Addresses, Clients and Users. As
indicated above, QuickFinder™ can
also easily display other database lists, with [Ctrl-L], [Ctrl-T],
[Ctrl-S] and [Ctrl-U], respectively. You can, of course, get
there using the menus.
Locations
(Ctrl-L):

Telecommunications
(Ctrl-T):

When searching in the
Telecommunications screen, if the first search characters are numbers, then
QuickFinder™ will automatically enter a telephone mask. For example, if you
type in "4127650490", QuickFinder™ will add the mask "( ) -
" to your search and search on "(412) 765-0490." If you search
on an Internet address for example, the mask will not be added.
Clients
(Ctrl-S):

Users (Ctrl-U):

Notice that users
are listed by Nickname, not by full name.
- Dialup (Ctrl-D)
The Dialup form
shows for any entity, its direct connections, as well as all locations
connected to it, and the telecommunications connected to each listed location.
If you want to
call Gregg R. Zegarelli at work, you would see the Dialup below.
Why does it not
say Gregg R. Zegarelli? If you thought it should, re-read the Important message above. In the real world, you would look up
Gregg R. Zegarelli in QuickFinder™, then hit [tab] to go to the Search Window,
then hit [Ctrl-D] for Dialup on Zegarelli International. Gregg R.
Zegarelli has no relationship with 412-765-0490, only a relationship with
Zegarelli International, which entity has a relationship to 1100 Allegheny
Building, which location has a relationship to 412-765-0490. Get it? Once you
master the concept, you will never go back to traditional databases.
![]() Key: Right-clicking. You can right-click
to Relate and Unrelate objects. You can also resize the panels. Unrelating does
not delete an object, just breaks the connection between them. The object will remain
connected to any other objects.
Key: Right-clicking. You can right-click
to Relate and Unrelate objects. You can also resize the panels. Unrelating does
not delete an object, just breaks the connection between them. The object will remain
connected to any other objects.
![]() Tip: Minimize Dialup to save for later. If
you use Dialup to make a telephone call, and the line is busy, etc., you can
minimize the Dialup form and use it later. As a result, you save time because
you do not need to look up the telephone number again later.
Tip: Minimize Dialup to save for later. If
you use Dialup to make a telephone call, and the line is busy, etc., you can
minimize the Dialup form and use it later. As a result, you save time because
you do not need to look up the telephone number again later.
- Properties (Ctrl-R [Data Properties] Ctrl-O [Relation
Properties])
Each object has its
own properties, as seen below for the entity, Zegarelli International.
Most properties
boxes have two checkboxes: one for "Private" and one for "Lock
this Entry." Only the creator of an object can mark it as Private. If an
object is marked as Private, then only the creator and the Administrator can view
the properties. If a user marks an object as Locked, then no other users
(except the Administrator) may edit the properties. When an object is
locked, the person who locked the object will be identified.
Users have an extra
tab called "Users" that contains user information. Clients have an
extra tab called "Clients" that contains client information. Two
important tabs: Electronic Notifications and Relations.
1. Electronic Notifications. The
Electronic Notifications tab has two areas: a) E-mail Addresses for recipients
of the type MindSaver notices indicated in the comboBox; and the b) Default
E-mail Address. The Default E-mail Address contains the same data as the Default
E-mail Address accessed via the
Password dialog box. The MindSaver E-Mail Addresses are used by MindSaver™ for automated MindSaver™ docket mail. The Default
E-mail Address contains the e-mail address that is an entity’s primary e-mail
address. There are also electronic notifications used by MindSaver for
Birthdays, etc. Each MindSaver category can have its own list of distributees.
Use the comboBox to select the MindSaver category. See Section
2.g. for information on MindSaver.
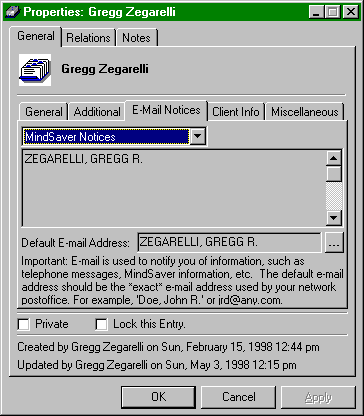
For example,
Zegarelli International could have multiple MindSaver E-Mail Addresses, for
each officer, so that all MindSaver™ information goes to multiple different
persons.
![]()
![]() Key
Concept: Data Object
Properties v. Relation Object Properties. Each data object has
properties, and the relations between data objects have properties.
Key
Concept: Data Object
Properties v. Relation Object Properties. Each data object has
properties, and the relations between data objects have properties.
In QuickFinder™,
you can RIGHT-click to obtain the properties of a data object, or the
properties of the relationship between the data objects. The properties for a
data object identify, for example, the date the object was created, whether its
properties are private, etc. Likewise, because the relationship is its own
object, it has similar properties.
The figure below
identifies the properties of the relationship between Zegarelli International
and Gregg R. Zegarelli. The relationships also contain a "rank" which
is a priority level for sorting purposes: the lower the number the higher in
the list it sorts. The "Show this Relationship in E-MSG!® indicates
whether this relationship will be displayed in the E-MSG!
notice for drill down purposes.
Also, each
relationship between entities may have an unlimited number of relationship
names. Why? Because you may wear many
hats at your company, and it is necessary to track each of these
"relations" and each relationship’s properties. For example, you
might be the President, Secretary, Treasurer, Board of Director Member, and
Shareholder. Create relationship names by RIGHT-clicking and selecting New. For
intuitiveness, this is called the "Titles" property box, but for
person-to-person relationships, the relation is not really a "title."

Each title can be
categorized. For example, the President is a type of "Officer." In a
person-to-person relationship, for example a sister-to-brother could be a
"Immediate Family" relationship type. The Primary Title is the title
preferred to be used by that entity.

![]()
![]() Key
Concept: Titles/Relationships
go two-ways. In other words, in the example below, Zegarelli International is
the Parent of Test Company, but Test Company is not the Parent of Zegarelli
International. Therefore, you can specify the reverse relationship name. Also,
the properties box will prompt you to save the relations for future reference.
Key
Concept: Titles/Relationships
go two-ways. In other words, in the example below, Zegarelli International is
the Parent of Test Company, but Test Company is not the Parent of Zegarelli
International. Therefore, you can specify the reverse relationship name. Also,
the properties box will prompt you to save the relations for future reference.

2. Relations. This is a very cool
feature. Each object looks "backwards" at the data related to it. See
below for an example of "drilling down" in the properties boxes. By
right-clicking in the respective relations areas, you can drill around and update
the data incrementally. This is the advantage of OOD, object oriented data!

Since the Relations
tab of the properties boxes contains listings of all connections with other
objects, by double-clicking and right-clicking you can open other properties
boxes. This is a very powerful feature for determining any and all relations
for any data object.
- QuickEntry™ (Ctrl-Y)

In the above
example, QuickEntry™ will create all the relationships by default, and will
make presumptions about the relationships based upon the information entered!
Remember, because information objects can be related in any direction, the
connection between objects must be specified. The above QuickEntry will
automatically do the connections identified above in the Important message (Section 2.c). Note the scroll bar on the
right-side, which allows up to 4 telecommunication addresses to be entered at
once.
![]() Tip: Enter information in tab order. If
you enter the information in tab order, staring with first name, e.g.
from top to bottom, QuickEntry™ will setup the default relationships most
accurately.
Tip: Enter information in tab order. If
you enter the information in tab order, staring with first name, e.g.
from top to bottom, QuickEntry™ will setup the default relationships most
accurately.
Additional Tab
(Defaults):
In QuickEntry, you
can establish certain defaults that can assist with mass entry. Importantly,
you can establish default information at the Additional tab, then by properly
checking the "After Applying…" checkboxes, you can keep certain
information for further entry.
Mass Entry: For example, if you need to enter 200 people all at
the same location, you would uncheck "Close On Apply" to keep the
form open after Applying, and you would uncheck the Location checkbox so that
the location is not cleared after Applying. Enter away. Remember, if you have
created certain defaults to use for mass entry (on the Additional tab), clear
and resave prior to exiting.


By clicking the
Save Default button, you save the defaults, which will be used again when
QuickEntry™ is launched again.
Oh, it looks so
innocent! Don’t be fooled, this little message pad is where it all happens. The
E-MSG!® Pad is an extremely powerful database front-end for the Pronexus™
database engine. You can launch the E-MSG!® Pad by [Alt-File-E-MSG!-E-MSG!
Pad] or simply [Alt-E].

In the To field,
you can enter a nickname or you can click the Post Office button to lookup
recipients from the network postoffice.
![]() Tip: Attach files. On the Additional
tab, you can attach a file to the message.
Tip: Attach files. On the Additional
tab, you can attach a file to the message.
As you type into
the Caller field, the Detail Message section is hidden and the list of all
persons in the database is revealed to you.
Rarely when a
receptionist takes a message does a person give his or her middle initial or
full first name. For example, Joseph R. Doe would probably not say, "this
is Joseph R. Doe calling." The E-MSG!® Pad resolves this in two ways:
first it searches a text file named "nicknames.txt" (which exists in
the Server Lists Directory) to translate nicknames to full first names; then,
it searches the database using soundex technology. This methodology allows the
Pad to try to find the most likely data entry for you. If you need to add a
special nickname for searching, like "JJ", the Administrator can do
this in Administration List Maintenance.
Use your Up/Down
cursor keys to select from the database. When you try to leave the Caller
field, the E-MSG!® Pad will verify that the entered name exists, if it does not
exist, you will be prompted to enter the new name into the database, or to use
the closest match.
Note the
spelling errors do not affect the system's ability to find the record. However,
soundex technology requires the first letter to be correct, i.e. it will
not find Cramer if spelled Kramer. Thus, receptionist should develop the
"Is that Kramer with a K?" system.

![]() Key: Down Arrow. When you get a list of
options, use your down arrow to select from the list.
Key: Down Arrow. When you get a list of
options, use your down arrow to select from the list.
Ziata will look for
all connections and will give you options for selection. Based upon the Caller,
the E-MSG!® Pad will search the database for the Caller’s "employer."
The E-MSG!® will enter the name in Company if there is only one relationship;
otherwise, a grid will appear with the list of all related companies. Use your
Up/Down cursor keys to select a company. When you tab to Location, the E-MSG!®
Pad will look for all locations related to that company. Then the E-MSG!® Pad
will look for all telephone numbers related to that location and the telephone
numbers directly related to the caller (such as mobile phone numbers).
To the extent that
the E-MSG!® Pad cannot find connections, and you enter new information, the
E-MSG!® Pad will automatically create the relationships for you. For speed and
ease of use, the system makes certain presumptions about the connections, which
our research has shown to be appropriate in most circumstances.

You can double
click on the correct telephone number, as well as use the Up/Down cursor keys,
to select a telephone number. (You can also resize the panels for easier
viewing.)
When you send the
message by clicking the Send button (or just hitting the [enter] key, since the
Send button is the default button), the E-MSG!® Pad will send the information
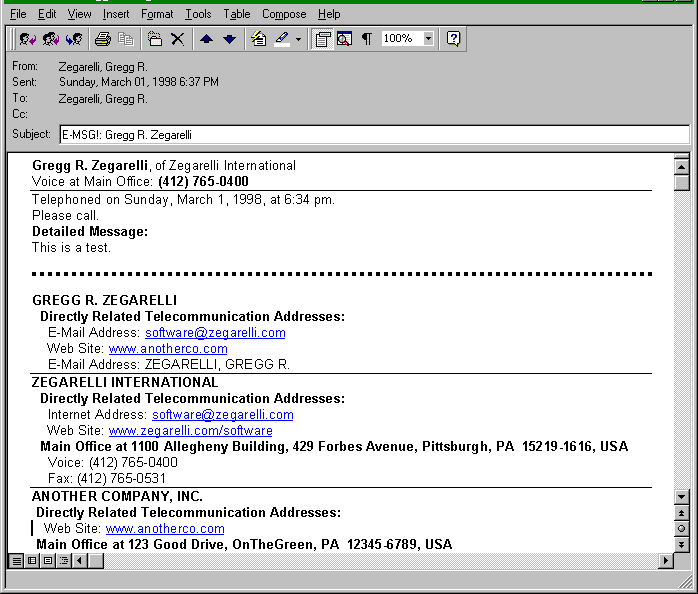
via the e-mail transport. The e-mail will be similar to below. If you use
Microsoft WordMail, the message will be beautifully formatted with the
formatting codes identified in Configuration.
IMPORTANT: YOU
MUST BE RUNNING E-MAIL AT ALL TIMES TO TAKE ADVANTAGE OF THE ZIATA! E-MAIL
CAPABILITIES.
![]() E-MSG!® drills down
automatically! When sending the message, the E-MSG!® Pad not only provides
the basic message (at the top of the message), but also, "drills
downs" completely through every relationship in the database, as
follows:
E-MSG!® drills down
automatically! When sending the message, the E-MSG!® Pad not only provides
the basic message (at the top of the message), but also, "drills
downs" completely through every relationship in the database, as
follows:
Directly related
telecommunication addresses
Directly related
locations
Directly related
phones at each directly related location
Each related entity
Its directly
related telecommunication addresses
Its directly
related locations
All directly
related phones at each of its directly related location
And so on! Very
slick!
![]() Key:
Receive e-mail regardless of being a user. You do not need to be a user
of Ziata! to receive the e-mail. E-mail can be directed to the Internet, etc.
Also, for example, if you are going to be out of the area, but will be checking
your e-mail, you can change your Default E-mail Address to your e-mail addresses, rather than your internal
network address. As a result, all entries will be flagged to be sent over the
Internet. You can even cc. your clients over the Internet, etc.
Key:
Receive e-mail regardless of being a user. You do not need to be a user
of Ziata! to receive the e-mail. E-mail can be directed to the Internet, etc.
Also, for example, if you are going to be out of the area, but will be checking
your e-mail, you can change your Default E-mail Address to your e-mail addresses, rather than your internal
network address. As a result, all entries will be flagged to be sent over the
Internet. You can even cc. your clients over the Internet, etc.
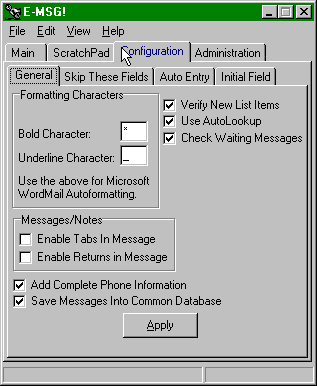
Configuration is
powerful, yet easy.
Following are
general configuration items, which are self-explanatory.
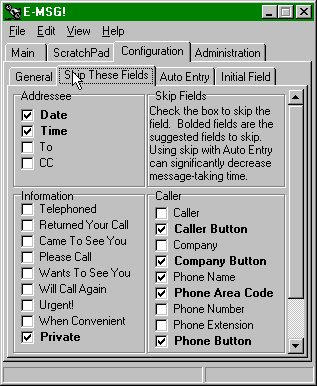
As you tab through
the E-MSG!® Pad, sometimes you don’t usually use all of the fields. To be fast,
you can turn off the tab through property, that is, you can force a skip-over
when you are tabbing. If you check the box, E-MSG!® will skip the field when
tabbing through. For example, if you rarely use the CC field, mark it to skip,
then you will not need to always hit the key to tab through it. If you need to
get to it, you can still click into it.
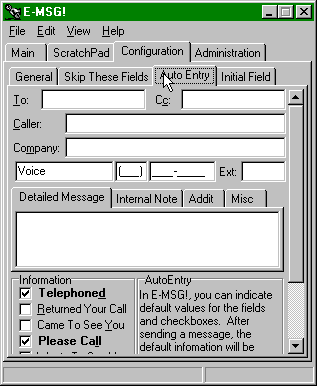
Following are
default auto-entries. If you place information in these fields, E-MSG!® will
enter the information into the Pad each time by default. The most common
auto-entry is the telephone area code, as well as the checkboxes checked below.
![]() Tip: Use Skip These Fields with Auto Entry to
substantially lessen message-taking time. If you enter default information,
plus skip the field, you can substantially decrease your message-taking time.
Tip: Use Skip These Fields with Auto Entry to
substantially lessen message-taking time. If you enter default information,
plus skip the field, you can substantially decrease your message-taking time.
After you send a
message, your cursor will be put in the location indicated. This way, you can
configure the Pad to put you where you need to be to take quick messages. Also,
you can specify what to do with the To/CC fields in terms of whether you want
to clear the field, use the same addressee as previously used or the default.
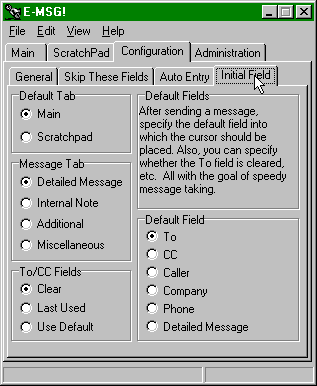
Using Lookup, you
can see each message taken with the E-MSG!® Pad, regardless of who took the
message. You can launch Lookup by [Alt-File-E-MSG!-Lookup] or simply [Alt-K].
If a message was
marked as Private, then if the viewer does not have the necessary privilege
level, that informational portion of the screen will be blank.
Lookup also has
powerful filters to help you find exactly the data you need. Certain searches
are extremely fast because of predefined database indexes. Remember to click
the [Apply] button to start the search. The relationship between the search criteria
is an "and" such that, if more than one criterion is searched, all
criteria must be satisfied for the record to meet the condition.
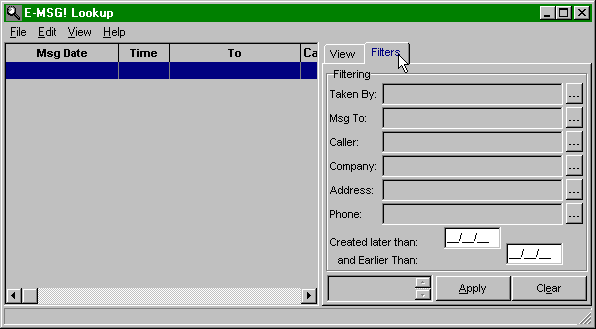
The In/Out Pad
tracks the location of staff. You can launch the In/Out Pad by [Alt-File-E-MSG!-In/Out]
or simply [Alt-I]. On the Entry tab, type in the first letter to
automatically scroll to the correct user.
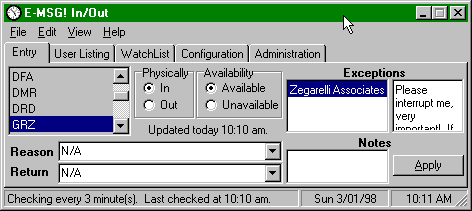
![]() Physical versus
Available. Conceptually, and often, you may be physically in the office,
but not available. Maybe you’re in a meeting, maybe you just need to
concentrate and you don’t want to be interrupted. That’s okay. Mark yourself as
physically in, but unavailable. This way, the receptionist knows you’re really
there for emergencies, etc. The Reason and Return comboboxes contain
pre-defined lists which are context-dependant upon the
in/out-available/unavailable combination.
Physical versus
Available. Conceptually, and often, you may be physically in the office,
but not available. Maybe you’re in a meeting, maybe you just need to
concentrate and you don’t want to be interrupted. That’s okay. Mark yourself as
physically in, but unavailable. This way, the receptionist knows you’re really
there for emergencies, etc. The Reason and Return comboboxes contain
pre-defined lists which are context-dependant upon the
in/out-available/unavailable combination.
![]() Key: Create Exceptions. If you are
generally unavailable, but not for everyone, you can create an exception.
Right-click over the Exception area and select a name. If the name is not in
the database, you can create it. If you don’t want to create the name or to
have automatic notifications, you can enter information into the Notes area. Use
of the Exception list is important because the Exception list is tied to the
E-MSG!® Pad. In other words, if you enter a company name as an
exception, then if anyone related to that company calls, while the message is
being taken by the receptionist in the E-MSG!® Pad, he or she will be
automatically notified of the exception by the Waiting
Messages Pad, which will
automatically popup. If you enter a person’s name as the exception, then only
that person calling will cause the reception exception notice.
Key: Create Exceptions. If you are
generally unavailable, but not for everyone, you can create an exception.
Right-click over the Exception area and select a name. If the name is not in
the database, you can create it. If you don’t want to create the name or to
have automatic notifications, you can enter information into the Notes area. Use
of the Exception list is important because the Exception list is tied to the
E-MSG!® Pad. In other words, if you enter a company name as an
exception, then if anyone related to that company calls, while the message is
being taken by the receptionist in the E-MSG!® Pad, he or she will be
automatically notified of the exception by the Waiting
Messages Pad, which will
automatically popup. If you enter a person’s name as the exception, then only
that person calling will cause the reception exception notice.
![]() Tip: Checking for WatchList Changes at any Time. You can
check for changes to your WatchList by performing a refresh at [Alt-View-Refresh]
or [Alt-H].
Tip: Checking for WatchList Changes at any Time. You can
check for changes to your WatchList by performing a refresh at [Alt-View-Refresh]
or [Alt-H].
All users are
identified at the User Listing tab. Right-click for a menu.
Important:
Double-clicking will add a user to your WatchList. (See below.)
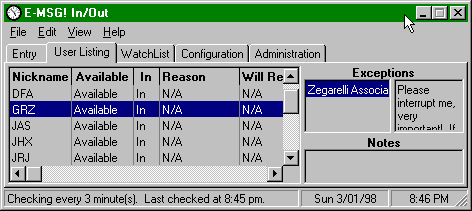
The WatchList is a
method to create a subset listing of all users for whom you want to be notified
if they change their in/out status. In other words, if there are 500 employees,
but your receptionist needs to watch only 4 of those employees, then he or she
creates a WatchList of those 4 persons. If any of those 4 persons change their
status, the receptionist will be notified as shown below. Add a person to
the WatchList by double-clicking on the person from the User Listing
tab. Delete a person in the WatchList by right-clicking in the WatchList
tab and choosing Delete.
Of course, the
In/Out is used by more than just receptionists, it can be used by employers
tracking staff, team members, etc.
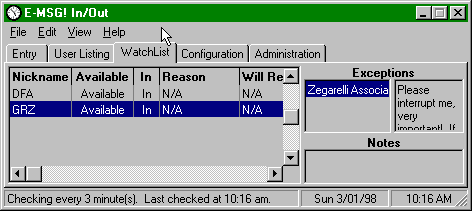
Following is an
example of the popup WatchList notification.
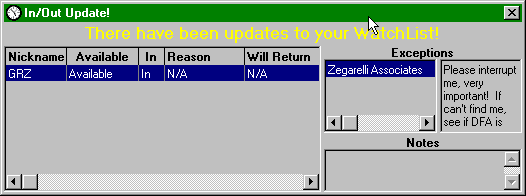
![]() Tip: Checking for WatchList Changes at any Time. You can
check for changes to your WatchList by performing a refresh at [Alt-View-Refresh]
or [Alt-H].
Tip: Checking for WatchList Changes at any Time. You can
check for changes to your WatchList by performing a refresh at [Alt-View-Refresh]
or [Alt-H].
Notices:
There is an extra
tab that is hidden by default: the Notices tab. You can display the
Notices tab by [Alt-View-Notices Tab]. A receptionist, for example, can
select one or more persons from his or her WatchList, and prepare automated
notices to any or all of such users indicating that they should update their
in/out status. For example, if GRZ did not update his status in a long time,
the receptionist could select him, click Send and he would get an automated
notice informing him to update his In/Out status.
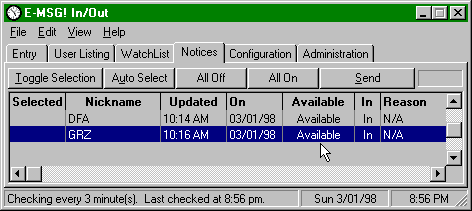
Configuration:
In/Out can be
individualized. If you rarely use the WatchList feature, you can remove the tab
from your form and otherwise turn watching off. You can also specify how often
In/Out checks for the updated status of users. The more frequent, the more
network traffic, but the more accurate the information. Checking every three
minutes is the default.
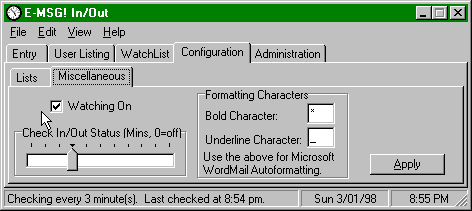
Waiting Messages
allows messages to be deposited for anticipated callers. You can launch the
Waiting Messages Pad by [Alt-File-E-MSG!-Waiting Messages] or simply [Alt-W].
This database is the same database used by In/Out. Therefore, every user’s
in/out exceptions are included in the Waiting Messages list, but are merged by
exception name. For example, if 3 users had an exception for John Doe, Inc.
then if John Doe called for any of them, the Waiting Messages Pad would pop up
and notify the receptionist. The receptionist could then very quickly respond
to each waiting message by sending e-mail to each depositor of the message.
Each e-mail is stored in the Lookup database, with the Source field indicated as
"Waiting Messages" rather than "E-MSG!"
Waiting Messages
can and should be used and checked, of course, by everyone. So, if any user is
on the telephone with a client, by checking the Waiting Messages Pad, any user
could inform the client that there is a message waiting from another user.
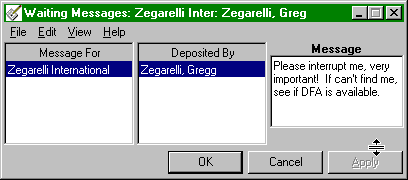
Sending a message
from Waiting Messages is easy. Double-click on the Deposited By area and you
will get a screen to send a message to any person as a reply. So, for example,
if 3 persons have a message waiting for John Doe, the receptionist can quickly
send a reply from John Doe to each person leaving the message.
- Client Management
- Clients/Customers, Files (Ctrl-S)
Clients and files
are managed in the Clients and Files form. You can launch the Clients &
Files by [Alt-File-Client Module-Clients & Files], or simply [Alt-S].
CREATE/DELETE
CLIENTS FROM THE QUICK FINDER TOP MENU (but not the right-click menu).
From the Entities
Properties box, you can obtain customer information. The name of the tab will
depend upon the name given to customers by the Administrator. For example, the
tab below says "Client Info" because the Administrator of the test program
used the name "Client" for customers. If the Administrator had used
"Patients" the tab would say "Patient Info." If an entity
is not a customer, then the tab will not appear. The alpha code is based upon
the first 3 alphabetic characters of the customer name plus the incremental
number of customers with the same first three characters. E.g. the first
ZEG is ZEG1, the second ZEG2, etc.
The responsible
team information, identified below as the "Engaging Attorney" etc.
are the three persons responsible for the customer. The team names are
established by the Administrator from the Configuration menu, and could be "Project Manager" etc.
This feature is useful for tracking who receives a bonus for engaging the
customer. Responsible teams are especially important in MindSaver (Server
Edition), because those individuals will receive automated notices.
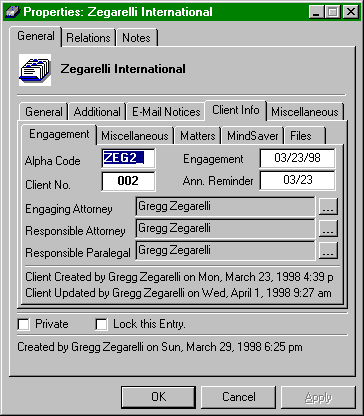
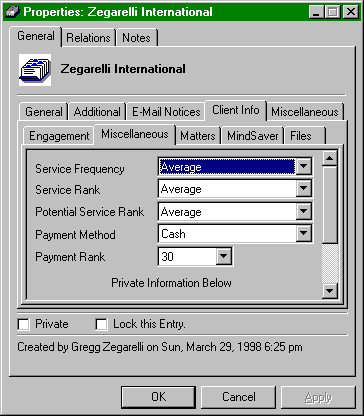
Matters:
Matters are also
called "projects" at some companies. The matter names are established
by the Administrator from the Configuration menu, and could be "Project,"
"Engagement," "Contract," etc.
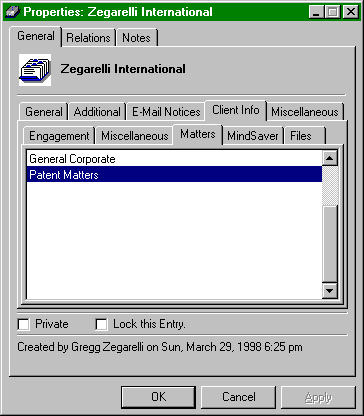
Double-click on
a matter to obtain properties for the matter. If the matter is complicated,
such that persons will be working on the matter who are not the Responsible
Client Team, you can give up to three individuals responsibility for the
matter.
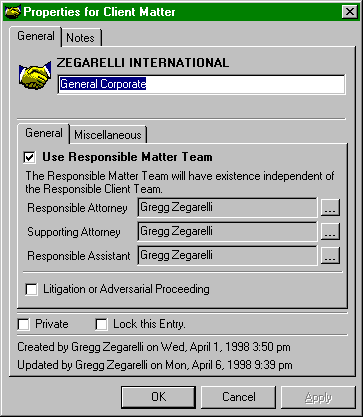
![]() Tip: User Categories. If you have
enough user licenses, you can create users with names like "Deadline
Manager," "Litigation Manager," etc. Attach the users to the
e-mail address of the proper person holding that title. Then, you attach these
users' titles to the matters. If you change the person with that title, you
only need to make one e-mail relationship change, you don't need to change all
of the individual matters.
Tip: User Categories. If you have
enough user licenses, you can create users with names like "Deadline
Manager," "Litigation Manager," etc. Attach the users to the
e-mail address of the proper person holding that title. Then, you attach these
users' titles to the matters. If you change the person with that title, you
only need to make one e-mail relationship change, you don't need to change all
of the individual matters.
MindSaver:
See also, MindSaver
Docketing at Section 2.g. below.
MindSaver gives you the ability to enter action items with one or more
associated dates. Using MindSaver (Server Edition), Ziata! will automatically
notify you (and your customers) of required action items.
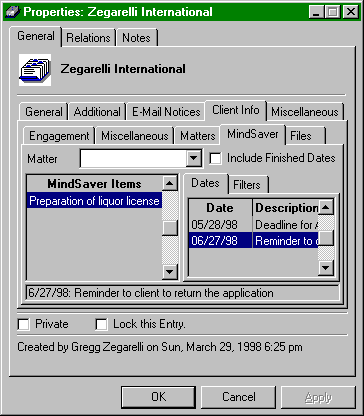
Files:
Double-click for
properties. Each file can have one or more subfiles. Each subfile can have an
unlimited number of documents. By right-clicking over a file or subfile, you
can take possession, transfer possession or release possession. In this manner,
the location of all files and subfiles are dynamically tracked. When you change
a possession status, an e-mail box will appear that allows you to send a notice
to the persons affected by the transfer. Also, MindSaver will generate late
notices if files or subfiles are possessed too long as established by the
Administrator.
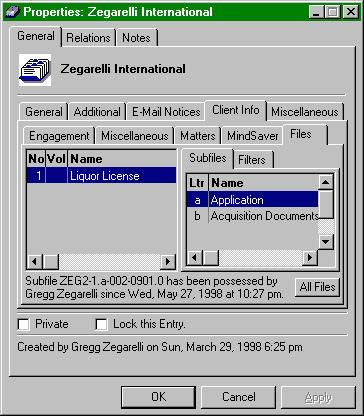
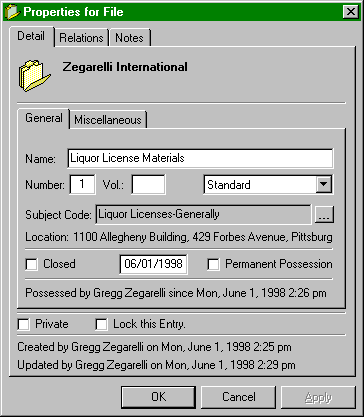
If a file or
subfile is intended to be possessed "permanently," the user should
take possession of the file from within the entities property box, then review
the properties. When a file is taken, a special property will be available,
called "Permanent Possession." By checking this box, the user will
not receive overdue file notices by MindSaver. Only high privilege levels, the
File Administrator or the Administrator (or if it is the user's file), will the
property be available for permanent possession (otherwise, everyone would mark
their possession as Permanent to avoid receiving notices).
- Mail/Fax Slips (Ctrl-X)
Mail Slips allows
you to track each piece of mail sent by the office. You can launch Mail Slips
Pad by [Alt-File-Office Management-Mail/Fax Slips], or simply [Alt-X].
Entering mail slips consists of:
1. Enter the Mail Item. Click New. Then, choose who the mail is being sent
to, and to which client it is going to be billed. You can also enter a MindSaver
Docket Entry, if the letter impacts
upon a due date.
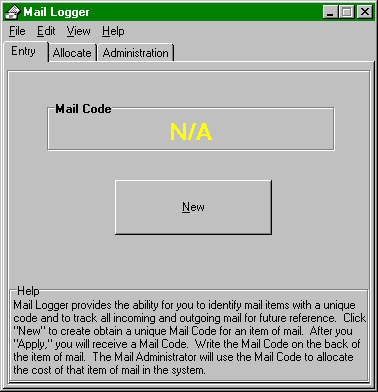
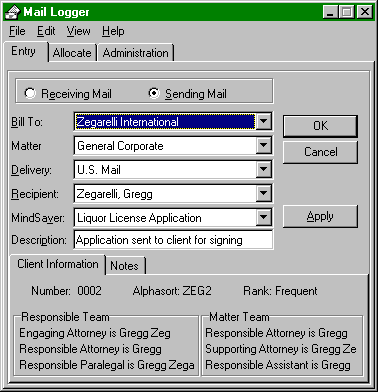
2. Get the Code. The code is rendered when you click Apply, i.e.
98-2778. Write the code on the back of the envelope. Give the item of mail
to the receptionist or mailroom.
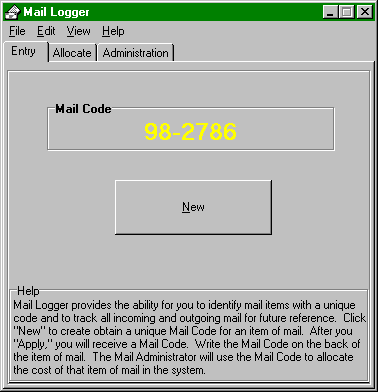
3. Allocate. Each entered piece of mail has "sending"
status until it is allocated. Allocate by weighing the item of mail, and
putting the amount of postage in the Amount field, then Apply. This will flag
the item of mail as "Sent."
You can see all
mail related to a client in the client's properties box within the Relations tab.
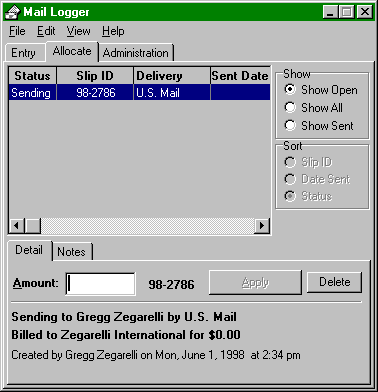
Double-click to see
the properties for an item of mail.
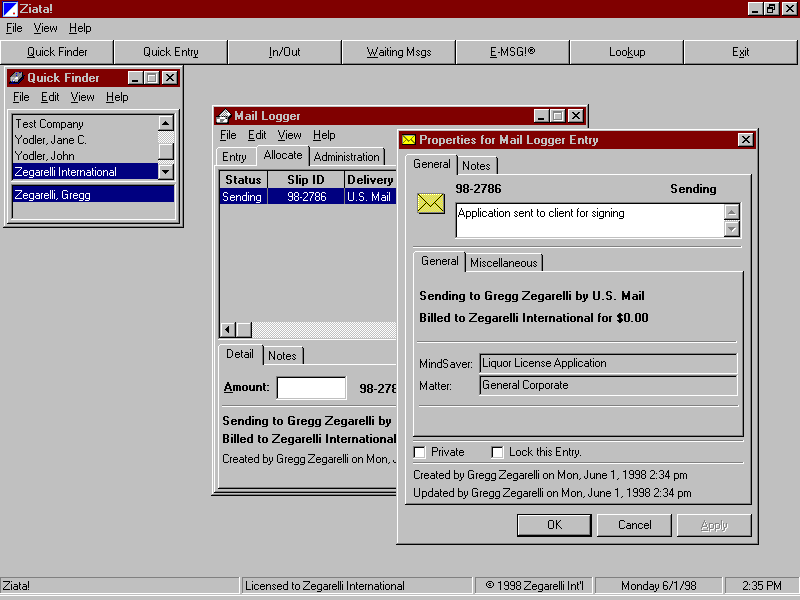
Subject Codes (also
called "matters" by some organizations) allow you to create subject
categories which are indexed by numbers. Therefore, you can give subject codes
to various data items for ease of searching and indexing later.
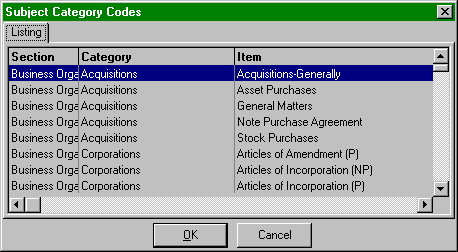
By right-clicking,
you can edit the properties for a subject code. You can identify a subject code
as being used for files, billing purposes or both.
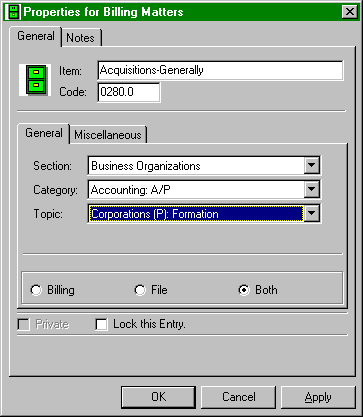
- Office Management
- Library/Books (Ctrl-B)
Ziata! manages all
of your library books. You can launch the Books Pad by [Alt-File-Office
Module-Books] or simply [Alt-B].
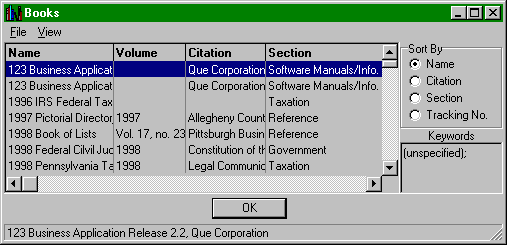
You can obtain the
properties for a book by right-clicking.
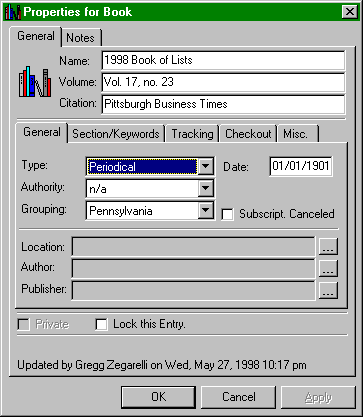
Ziata! provides extremely
powerful electronic mass mailings. Certain publications are not able to be
edited by users, such as the MindSaver publication. However, you can create
your own publications. You can create subscription lists which consist of
a standard e-mail address or the subscription list of another publication.
If circularity is created in that two publications refer to each other's lists,
don't worry, the system will reconcile the circularity.
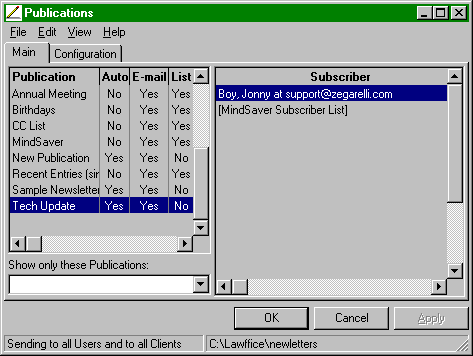
![]() Key: Recent
Entries. You will note a publication called "Recent Entries."
This is a special publication. Every time a new e-mail relationship is
established, it is saved in this publication. The Administrator has the ability
to clear subscriptions from this publication and/or move them into other
publications. Upon clearing subscriptions from the publication, it will be
renamed with a parenthetical as to the date it was last cleared. You can even
add the Recent Entries subscription list to other publications, which will
accordingly always have the latest e-mail entries.
Key: Recent
Entries. You will note a publication called "Recent Entries."
This is a special publication. Every time a new e-mail relationship is
established, it is saved in this publication. The Administrator has the ability
to clear subscriptions from this publication and/or move them into other
publications. Upon clearing subscriptions from the publication, it will be
renamed with a parenthetical as to the date it was last cleared. You can even
add the Recent Entries subscription list to other publications, which will
accordingly always have the latest e-mail entries.
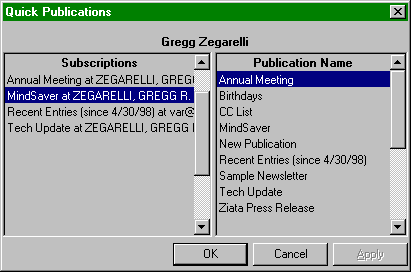
Another key
automation feature is the Quick Publications form. Each time a new e-mail
relationship is established, Quick Publications will appear. This feature can
be turned off by the Administrator. Quick Publications allows the person
entering the new e-mail address to then-and-there include that person as a
subscriber in the available publications. Just double-click the publication
name to add the person as a subscriber to that publication.
This type of
activity is an excellent example of the power of the Pronexus<tm>
database engine to manage workflow processes.
Below is the
property box for a publication.
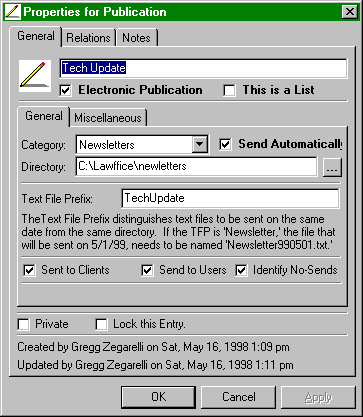
Some important
notes about the properties of a publication. First of all, the publication has
a name as indicated above as "Tech Update."
If the publication
is an electronic publication for mass e-mailing, you must select the Electronic
Publication checkbox; otherwise, the publication will be identified for
traditional physical mailings. Once established, you cannot change your
mind.
The "Send
Automatically" flag is used by MindSaver. If the checkbox is checked, then
each night, MindSaver will look for the publication and automatically send it
to the subscribers.
You do not have to
add Clients and Users to the subscriber lists, just check the boxes. Thus,
mailings to the persons will be dynamically maintained. "Identify
No-Sends" will add information to the log file identifying each e-mail
address which was not used by the publication.
![]() Tip: You can be liberal in your use of
referencing existing subscription lists. You can be liberal and
duplicative with creating and referencing subscription lists (i.e.
over-referencing) because Ziata! will not: 1) send to the same e-mail address
twice; and 2) will not send to the same entity at two different e-mail
addresses.
Tip: You can be liberal in your use of
referencing existing subscription lists. You can be liberal and
duplicative with creating and referencing subscription lists (i.e.
over-referencing) because Ziata! will not: 1) send to the same e-mail address
twice; and 2) will not send to the same entity at two different e-mail
addresses.
The publication
MUST be named in the form yymmdd.txt (yearMonthDay, e.g. 980612.txt) in
8 characters and must be a standard text file (you can include autoformatting
characters, such as "*"). If multiple different publication text
files will be in the same directory and are intended to be sent on the same night,
then publications with the same date MUST be preceded with the Text File
Prefix; this is how Ziata distinguishes publications with the same intended
send date. The "TFP" is not necessary if publication text files exist
in different directories.
When creating a
subscription, Ziata will try to use the most likely address, but will prompt
you for help if it needs it. If you want to make a change to the subscription,
just review the properties.
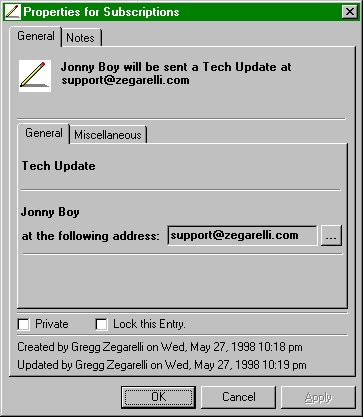
- Resource Logger (Ctrl-G)
Resource Logger
provides a method to track a common shared resource, such as a shared telephone
modem line or a CD-ROM. For these resources, interruption by another user would
crash the use by the first user. You can launch the Resource Logger by [Alt-File-Office
Module-Resource Logger] or simply [Alt-G]. The Resource Logger
allows a user to take possession of the resource to let other users know that
the resource is in use. This can be for technology equipment, but can be used
for trucks, lifts, etc. If the use of Resource Logger is being logged, then a
record of the activity will be preserved for historical purposes.
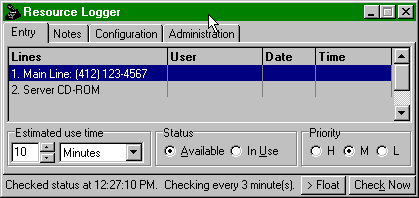
![]() Technical
Note: Location of database. The databases for the Resource Logger are
stored in the In/Out directory. This allows for resource sharing between
companies with different Administrators.
Technical
Note: Location of database. The databases for the Resource Logger are
stored in the In/Out directory. This allows for resource sharing between
companies with different Administrators.
You can configure
Resource Logger for defaults, as well as how to log you in when the resource
becomes or is free.
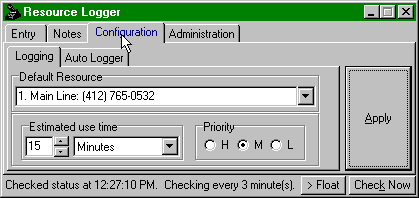
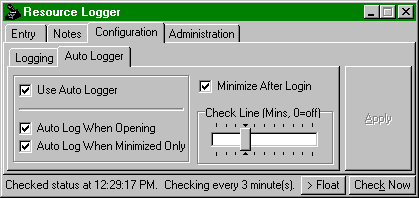
You can also create
new resources, delete a resource or force a logout of another user.
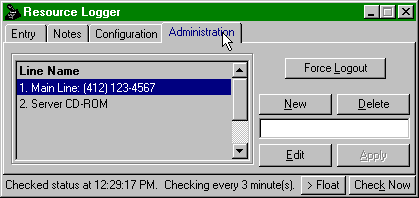
- Standard
Operating Procedures
(Ctrl-Z)
As SOP is a
Standard Operating Procedure for your office operations. You can launch the SOP
Pad by [Alt-File-Office Module-SOPz] or simply [Alt-Z].
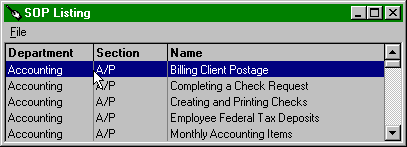
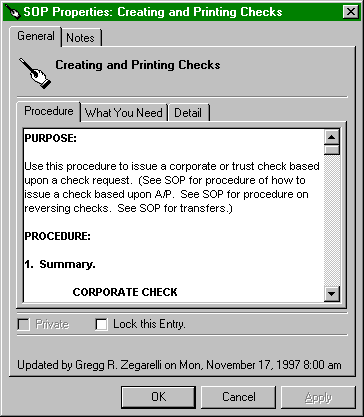
- MindSaver™ Docketing (Ctrl-V)
MindSaver™ is a
sophisticated to-do management system. You can launch the MindSaver™ Pad by [Alt-File-MindSaver]
or simply [Alt-V]. You can enter an unlimited number of to-do’s, i.e.
MindSaver Entries, and for each MindSaver Entry, any number of related dates.
This is extremely important for attorneys and CPA’s tracking deadlines.
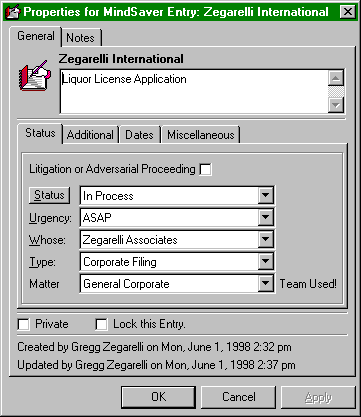
Note that, if a
matter has a Responsible Matter Team, it will be indicated. Click the Status
button to mark the item as Finished. The checkbox "Litigation or
Adversarial Proceeding" is user defined by the Administrator.
For each MindSaver
Entry, you create any number of MindSaver Date Entries. You can see all Date
Entries for a MindSaver Entry on the Dates tab. Double-click or RIGHT-click to
obtain the properties for the Date.
.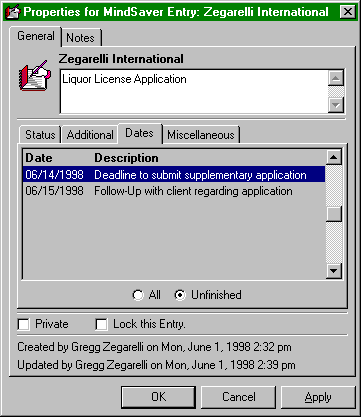
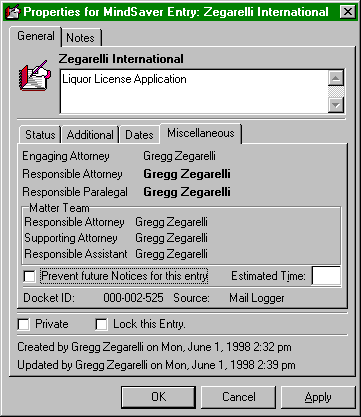
The Miscellaneous
tab indicates the team for the customer and the matter, if applicable. If you
want to prevent the future entry of electronic customer notices via the
Internet, click the box.
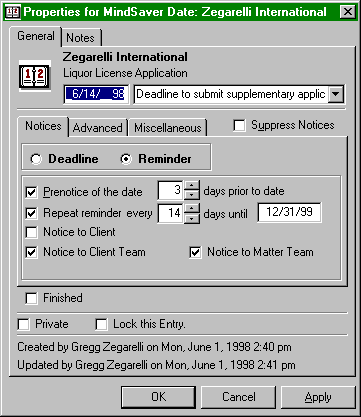
Each MindSaver Date
Entry contains a date, and a short description of what is due or needed to be
done on that date. A Deadline is just that: an important date, after
which the date is irrelevant. A Repeating Reminder is a reminder that
just keeps being sent at certain intervals until the reminder is no longer
necessary (as indicated by the "until" date). A Reminder that
is not checked to repeat is effectively the same as a deadline, but the notice
says "Reminder" not "Deadline." A Prenotice is an
additional reminder that is sent a certain number of days prior to the actual
deadline or reminder date. If a prenotice is checked for a Repeating Reminder,
it will be sent only one time, before the first Reminder date (unless you
change the default on the Advanced tab). A MindSaver date entry defaults to the
next day; you can use your up/down arrows, the T (today) key and right-click
for a calendar.
Notice to Client is enabled if the client has an e-mail address
entered in its MindSaver E-Mail Addresses (see Section 2.c.iii.1), and, if it is checked, the
client will receive an automated e-mail over the Internet, for example. This is
great for lawyers and accountants who are in deadline-related professions and
want to eliminate malpractice. Notice to Responsible Team will generate
separate notices for each person on the client team. Client teams are
established in the Clients Module or in the entity property box.
![]() Caution. Notices
only work if MindSaver (Server Edition) is running.
Caution. Notices
only work if MindSaver (Server Edition) is running.
![]() Tip: For any MindSaver Entry, establish
multiple dates with different properties. For example, let’s say there
is a hard deadline in a year, and you want monthly repeating notices, but every
two months you also want the Client and the Responsible Team to get notices. MindSaver™
eats it up! Create the Docket Entry. Create a Deadline date for the actual
deadline in one year; maybe give a 30 day prenotice, just to be sure. Create a
Repeating Reminder for every 60 days with properties set for the client and
team notices. Create another Repeating Reminder for the intermittent 60 days
without the client and team notices. You would probably not need the Prenotices
on the Repeating Reminders. Simply stated, you can have all sorts of dates for
one Mindsaver docket entry, with every different date having its own
characteristics for messages and notices!
Tip: For any MindSaver Entry, establish
multiple dates with different properties. For example, let’s say there
is a hard deadline in a year, and you want monthly repeating notices, but every
two months you also want the Client and the Responsible Team to get notices. MindSaver™
eats it up! Create the Docket Entry. Create a Deadline date for the actual
deadline in one year; maybe give a 30 day prenotice, just to be sure. Create a
Repeating Reminder for every 60 days with properties set for the client and
team notices. Create another Repeating Reminder for the intermittent 60 days
without the client and team notices. You would probably not need the Prenotices
on the Repeating Reminders. Simply stated, you can have all sorts of dates for
one Mindsaver docket entry, with every different date having its own
characteristics for messages and notices!
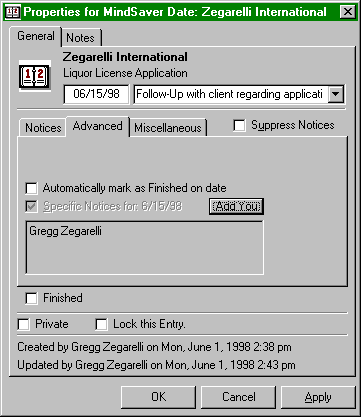
After a Deadline or
Reminder date passes, MindSaver (Server Edition) will default to continue to
generate notices identified as "Outdated." Whether this is a good
thing or a bad thing is up to you. If you check the box to "Automatically
mark as Finished on Date," MindSaver™ will mark the Date Entry as finished
so you do not get "Outdated" notices. This is good for convenience,
but it is certainly safer if you force you or your staff to evaluate the
content of the date and to manually mark it as finished if that is a true fact.
In malpractice-related professions, such as accountancy, law and medicine, we
do not recommend checking the box for automatically marking as finished.
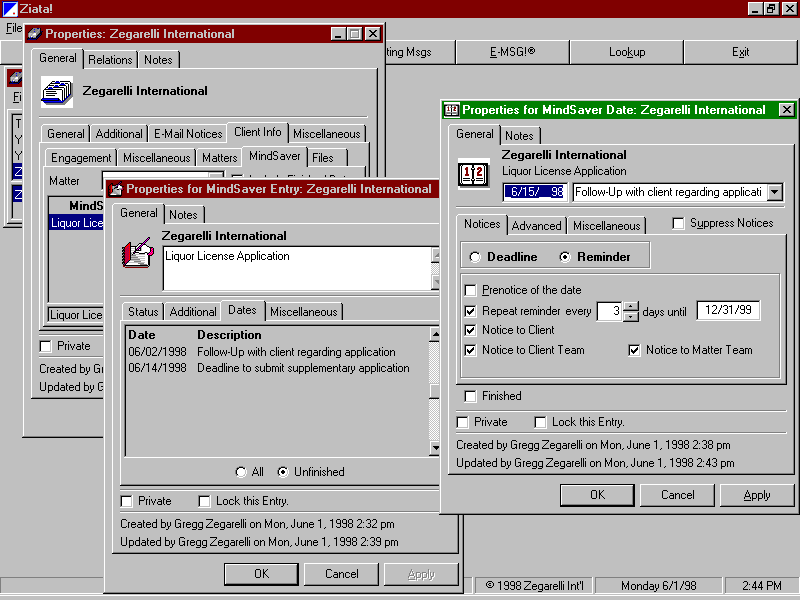
Each night,
Mindsaver looks for upcoming Mindsaver Date Entries. If it finds an item either
due or for which a prenotice is timely, it packets a mail message to the
appropriate parties. You must have the proper information entered into the
Administration tab.
IMPORTANT: YOU
MUST BE RUNNING E-MAIL AT ALL TIMES TO TAKE ADVANTAGE OF THE ZIATA! E-MAIL
CAPABILITIES. RUN MAIL ON THE SERVER, THEN LOAD MINDSAVER (SERVER EDITION).
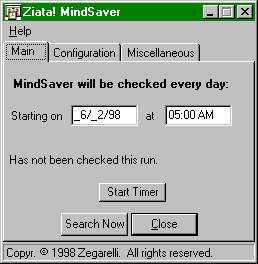
![]() Caution. MindSaver (Server Edition) runs on the
server. Therefore, to run MindSaver (Server Edition), you must have installed
Ziata! on/from the server, so that the database engine is installed locally on
the server. Normally, Ziata! is not required to be installed on the server. (A
Server Installation from a workstation places the databases on the server, but
that fact does not require installation of Ziata! program files on the server.)
Caution. MindSaver (Server Edition) runs on the
server. Therefore, to run MindSaver (Server Edition), you must have installed
Ziata! on/from the server, so that the database engine is installed locally on
the server. Normally, Ziata! is not required to be installed on the server. (A
Server Installation from a workstation places the databases on the server, but
that fact does not require installation of Ziata! program files on the server.)
On the subject
line: if "MindSaver" is spelled with a capital "S" then the
MindSaver was sent to the customer, otherwise, it is spelled
"Mindsaver." If the type of notice, e.g. Reminder, Deadline or
Recurring Reminder is followed by an exclamation point, the user-defined flag
was checked.
MindSavers are
automatically sent regarding MindSaver Docket Entries, overdue Books, overdue
Files and Subfiles, Annual Reminders and Birthdays.
MindSavers are
also sent to the Administrator, File Administrator and Librarian to inform him
or her of transmittal errors regarding those databases. The File Administrator
and Librarian are established by the Administrator in the Configuration menu.
When MindSaver runs successfully it will notify the proper parties of the same;
therefore, the absence of a daily notice indicates a problem and the log file
should be reviewed.
Following is an
example of a MindSaver Docket Notice, a copy of which would be sent to your
client over the Internet, if that checkbox was checked. You can eliminate
paper, ticklers, reminders and malpractice with automated notices.
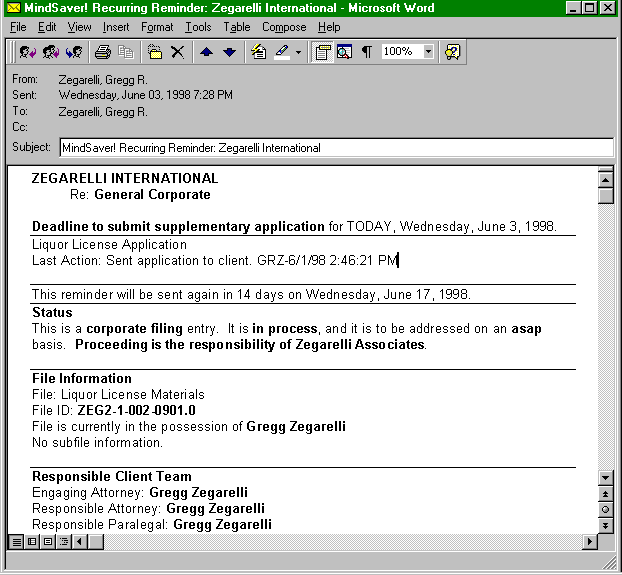
The date counter is
available by RIGHT-clicking within many date fields.
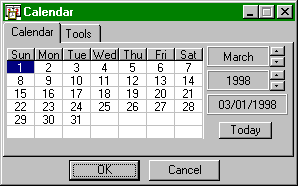
Use the Date
Counter to count days between dates. Roll To Weekday will cause the deadline to
roll to the next weekday, if the date otherwise would be on a weekend.
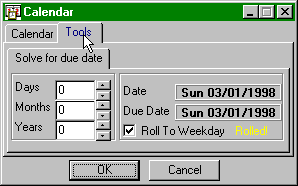
You can import data
into Ziata! by launching the Import Wizard at Alt-File-Utilities-Import.
The data must be in a comma-delimited text file.DEF_TEXTFILE
The structure is as
follows:
Field Number Field Name Example
1 First Name John
2 Middle Initial R.
3 Last Name Doe
4 Family Lineage Jr.
5 Degree M.D.
6 Salutation Dr. Doe
7 Birthdate 5/26/58
8 Male True
9 Title President
10 Company Doe, Inc.
11 Address 1 1100 Allegheny
Building
12 Address 2 429 Forbes
Avenue
13 City Pittsburgh
14 State PA
15 Zip 15219-1616
16 County Alllegheny
17 Country USA
18 Phone 1 Name Main Voice
19 Phone 1 (412)
765-0490
20 Phone 1
Extension 111
21 Phone 2 Name Fax
22 Phone 2 (412)
765-0531
23 Phone 2
Extension
24 Phone 3 Name 800 Number
25 Phone 3 (800)
000-1111
26 Phone 3
Extension
27 Phone 4 Name Secondary Voice
28 Phone 4 (412)
000-0490
29 Phone 4
Extension
30 E-Mail ziata@zegarelli.com
31 Website http://www.zegarelli.com/ziata
For blank fields,
keep the comma delimitation, but do not include information (see below
immediately prior to "Secondary Voice"). The above would be in the
form of:
"John","T.","Doe","Jr.","M.D.","Dr.
Doe","5/26/58","TRUE","President","Doe,
Inc.","1100 Allegheny Building","429 Forbe
Avenue","Pittsburgh","PA","15219-1616","Allegheny","USA","Main
Voice","(412)
765-0490","111","Fax","(412)
765-0531","","800 Number","(800) 000-1111",,"Secondary
Voice","(412)
000-0490",,"ziata@zegarelli.com","http://www.zegarelli.com/ziata"
and would be in one
single line (any wrapping of the above line is being performed by your computer
for viewing purposes). The next line would be the next record of information.
Each field of
information is considered a text field; therefore, each field must be enclosed
in quotations, except that Ziata! can read .CSV files. Therefore, if you
have a spreadsheet program that can read and write .CSV files, you can import
your text into the spreadsheet first, freely manipulate it, and save it as a
.CSV file. There is a sample import file in the Ziata! program folder
(specifically, c:\program files\zegarelli\ziata\workstation\workstationMain).
Important: Since Ziata! uses the OODIDH_REF_OOD concept, data
coming from other programs needs to be broken down into its component objects.
Therefore, for example, if your data records do not have company information,
the location will be determined to be associated with the person. Even though
the import record structure allows for a full "business card" of
information, just leave blank any fields not applicable to your data being
imported.
- Maintenance (Ctrl-F12)
Maintenance
provides a method to enter and to send a bug report. The bug report will be
sent to the address identified in the Configuration tab. Each bug will also be
saved in the database, which can be retrieved by your consultant and forwarded
to Zegarelli International.
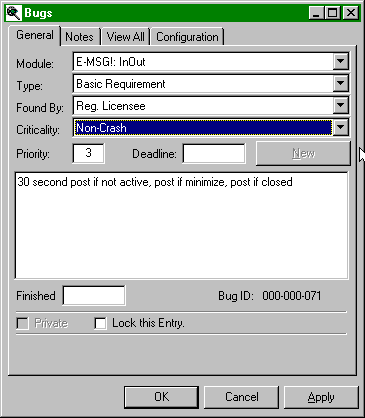
SEE README.TXT FOR LATEST INFORMATION.
Installation
usually occurs with the Network Administrator doing the following:
- Copy the Ziata.EXE compressed distribution file
to a common network drive.
- Unzip Ziata by typing "Ziata"
(without quotes).
- Run SETUP.EXE program, which will install Ziata
to the c:\program files\zegarelli\Ziata directory. (This puts all files
on the workstation.)
- Perform a Server Installation to a network
drive. (This copies all server files from the workstation to the
server.)
- Run SETUP.EXE from each workstation (see #3).
(You don't need to do this again on the workstation from which you
performed the server installation.)
- Perform a Workstation Installation identifying
the server path provided in the Server Installation (see #4). (This
tells the software to look for the server files on the server versus the
server files on the workstation.)
Technically, you
don't need to keep server files on any workstation, after the server or
workstation install, as provided above. They are located in the server
directory. You do need them if you perform the default install because you're
running the entire program in standalone mode.
![]() Caution. If you change your mind and want to
reconfigure, delete ziata.ini, which exists in the Windows95/NT root directory. Rerun the software. If you want to de-install, do so
from the Control Panel, Add/Remove Programs.
Caution. If you change your mind and want to
reconfigure, delete ziata.ini, which exists in the Windows95/NT root directory. Rerun the software. If you want to de-install, do so
from the Control Panel, Add/Remove Programs.
The first time you
access the databases you will be prompted for a Company Name and Administrator
Name. This information is encoded into your license identification and
databases. You cannot change this information, and it is displayed to users.
![]() Caution. Information must be accurate to upgrade your
license. Inaccurate data will cause you to lose your data!
Caution. Information must be accurate to upgrade your
license. Inaccurate data will cause you to lose your data!
Database Encoding:
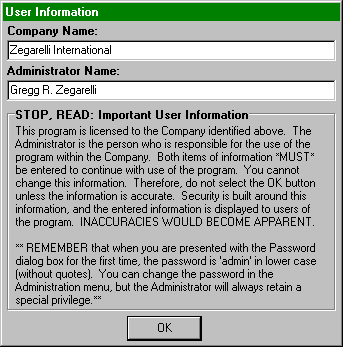
Proceeding from
this dialog causes the databases to be encoded with important information
concerning your license. On first use, and thereafter from time-to-time, the
following message will pop-up to users. Each user must personally type
"confirmed" or the software will not operate; therefore, pirated and
unauthorized copying would become apparent to users.
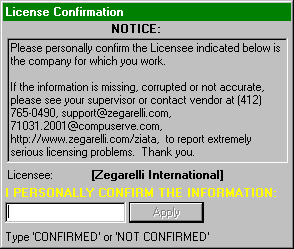
Occasionally,
Ziata! will display the above message to confirm licensing. Until registration,
the above box will be displayed frequently.
Installation
Choices (Database Location Choices):
If Ziata! does not
find ziata!.ini in the windows95/NT root directory, which is the case
on the first run on each workstation, it causes the following dialog to appear.
This dialog gives the user the ability to specify where the databases are
located or where you want them to be.
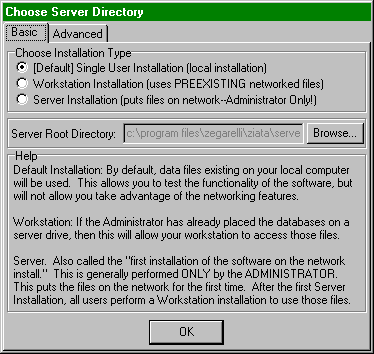
Default
Installation: By default, data files
existing on your local computer will be used. This allows you to test the
functionality of the software, but will not allow you take advantage of the
networking features. Our recommendation: do the Server Install rather than this
install; it will make your life easier in the long run.
Workstation: If the Administrator has already placed the databases
on a server drive, then this will allow your workstation to access those files.
Server: Also called the "first installation of the
software on the network install." This is generally performed only by the
Administrator one time for each network. This puts the files on the network for
the first time. After the first Server Installation, all users perform a
Workstation installation to use those files. A Server Installation also sets up
the workstation from which the Server installation occurred, i.e. you
don’t have to do a subsequent Workstation Install on the computer from which
you performed a Server Installation.
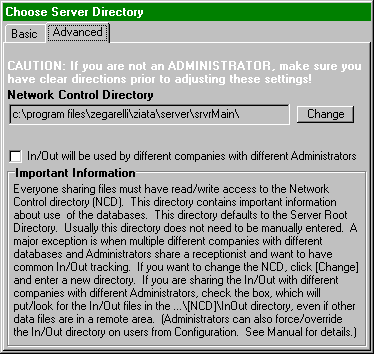
Network Control Directory. Everyone
sharing files must have read/write access to the Network Control directory
(NCD). This directory contains important information about use of the
databases. This directory defaults to the Server Root Directory. Usually NCD
directory does not need to be manually entered. A major exception is when
multiple different companies with different databases and Administrators share
a receptionist and want to have common In/Out tracking. If you want to change
the NCD, click [Change] and enter a new directory. If you are sharing the
In/Out with different companies with different Administrators (i.e. not
multiple companies with the same Administrator), check the box, which will
put/look for the In/Out files in the ...\[NCD]\InOut directory, even if other
data files are in a remote area. (Administrators can also force/override the
In/Out directory on users from Configuration.)
- First Login. The first time you log into Ziata!, you need to
do the following to setup the initial account:
- Login.
Login using the password you established during installation.
- Click the QuickFinder button. Click the name 'Adminstrator', then right
click for Properties:
- Click the Electronic Notifications tab,
right click, select Relate. When you get the telecommunications dialog,
select New, turn of the Mask, and enter your internal Default E-mail Address in the form entered in the postoffice, or
your internet address. Select.
- Add Users. Add Users by selecting at Main Menu, File, Configuration,
Password. Click on the Administration tab. Click NEW to create a new
user. Double click a user from the list to edit the user. After login,
you can edit the User Initials and password by selecting the
Administration button. Right-click to create a new user. Double click a
user from the list to edit the user. (Remember that all users are
clients.)
- Requirements, Compatibility. Ziata! is written for Windows NT and Windows 95. It is a 32 bit
application and will not run in other environments. Like most Windows 95
programs, we recommend at least 16 megabytes of RAM, but should run—albeit
slowly—with 4 megabytes. We also recommend at least 50 megabytes of free
disk space on each workstation for data caching. Ziata! uses the MAPI
protocol. MAPI is the messaging protocol used by the Inbox with Microsoft
Windows 95.
Even though Ziata! operates
with Windows NT/95, any computer able to receive MAPI e-mail (such as Windows
3.11) can receive messages because messages are transported using MAPI. So, if
the receptionist has a Windows 95 system, the entire office could receive
formatted messages if they use the MAPI protocol.
![]() Technical
Note: Mail Recipients. Because Ziata! uses MAPI, if your address book
is setup to send via the Internet, then when you send a message to that
addressee MAPI takes care of the rest. There is a utility to modify MS Windows
95 Exchange to enable it for the Internet. You can get the utility at http://www.microsoft.com.
Technical
Note: Mail Recipients. Because Ziata! uses MAPI, if your address book
is setup to send via the Internet, then when you send a message to that
addressee MAPI takes care of the rest. There is a utility to modify MS Windows
95 Exchange to enable it for the Internet. You can get the utility at http://www.microsoft.com.
Server
Structure:
Server Root
Directory
emsg: E-MSG!® databases
inOut: In/Out databases, Resource Logger database
srvrAdmn: Administration databases and logs
srvrData: Primary databases
srvrList: All universal text lists
srvrMain: Password Files
srvrRpts: All universal reports
Workstation
Structure:
Workstation Root
Directory
workStationList: All individualized text lists
workStationMain: Temporary database files
workStationRpts: All individualized reports
The reason that the
server directories are not greater than 8 characters is because certain
versions of network operating systems do not support long filenames. Microsoft
NT does support long filenames.
At the time of
installation, Ziata! includes a number of information-oriented files to assist
you with using the software. The usual location of the files is in the
c:\program files\zegarelli\ziata folder. If you want to access this folder
using the icon view, you can right-click the Window95/NT Start Button, select
open, click the Program Files group icon, then the Ziata group icon.
|
Document Name |
Document File Name |
Type
File; Viewed With |
Purpose |
|
Readme File |
readme.txt |
(ASCII) Text File; Notepad, WordPad, most wordprocessors |
Contains the latest information about the product, including the newest installation information. |
|
License Agreement |
license.txt |
(ASCII) Text File; Notepad, WordPad, most wordprocessors |
Contains terms and conditions for use of the distribution items. |
|
History |
history.txt |
(ASCII) Text File; Notepad, WordPad, most wordprocessors |
Contains revision history. Look here to see the fixes between release versions. |
|
Manual (Word 7) |
workingManual.doc |
Word 7.0 File; Microsoft Word Version 7 |
Contains the user instructions for the product. |
|
Manual (Word 6) |
manual.doc |
Word 6.0 File; Microsoft Word Version 6 and above; WordPerfect 5.0 and above, WordPad |
Same information as Manual (Word 7), but in this format. This file is not supplied with the primary installation files and must be downloaded separately from the website. (The reason is because of the way this version stores graphic files, it becomes more than 22 megabytes). |
|
Website Home Page |
index.html |
HTML File; Microsoft Explorer; Netscape Navagator |
This is the page for our website home page to make linking convenient. |
|
Website FAQ Page (Frequently Asked Questions) |
faq.htm |
HTML File; Microsoft Explorer; Netscape Navagator |
Contains answers to frequently asked questions. |
|
Installation Checklist |
checkList.doc |
Word 6.0 File; Microsoft Word Version 6 and above; WordPerfect 5.0 and above, WordPad |
Contains a matrix to assist the network administrator with installing the product. |
|
Current Price Sheet for the |
priceSheet.doc |
Word 6.0 File; Microsoft Word Version 6 and above; WordPerfect 5.0 and above, WordPad |
Contains the latest pricing information. |
|
Various Distributor-related documents |
distributorAgreement.doc |
Word 6.0 File; Microsoft Word Version 6 and above; WordPerfect 5.0 and above, WordPad |
Distributor/VAR Agreement; Exhibits |
- HOW DO I (do this or that)?
- Enter a new user?
Alt-File-Configuration-Passwords-Administration Tab. See Section
2.b.ii.
- Enter a "business card" of
information about someone?
Ctrl-Y for
QuickEntry. See Section 2.c.iv.
- Personalize my settings?
Alt-File-Configuration-Defaults.
See Section 2.a.iv.
- Enter someone's birthday?
Enter QuickFinder,
find name, Ctrl-R for properties. See Section 2.c.iii.
- Have MindSaver™ send me automated notices?
Run MindSaver
(Server Edition) on a server or other machine that operates constantly. Confirm
on the Configuration tab that MindSaver is setup to send the notice you intend.
Make sure that the timer is running (the timer is running if the button says
"stop timer." You must be running your mail program. Ziata! packages
your mail, but your mail package is still responsible to do the sending.
That's all.
- Send mass electronic publications/newsletters?
Alt-File-Office
Module-Mass Mailings. Create a normal text file. Ziata will read this file and
the first line will be the e-mail subject. Create a Ziata publication object
which properly references the text file. Add subscribers to the publication. If
the publication is not automated, select Generate Mailing from the menu;
otherwise, ensure that MindSaver (Server Edition) is running. See Section
2.f.ii. You must be running your mail program. Ziata! packages your mail, but
your mail package is still responsible to do the sending.
- Know how many licenses I need?
You generally need
one license for each simultaneous user. (If you have multiple persons using
Ziata at different times, you only need one license, but you would lose all of
the inherent data creation tracking because all users will share the same
identity.) You would also need extra licenses to the extent you want to take
advantage of "titled users," such as Deadline Manager, IP Manager,
etc. You do not need a license for anyone merely receiving e-mail notices.
Thus, you could have one receptionist with one license sending E-MSG! notices
to 200 users and only need one license, but the 200 recipients would not be
able to use Ziata! (they would only receive e-mail).
- I perform mass data entry?
Ctrl-Y for
QuickEntry. See Section 2.c.iv. Put information in the default fields. Turn off
the "Reset Defaults" for the fields you want to remain consistent
with each record. Turn off "Close on Apply."
- Quickly find a telephone number?
Ctrl-Q for
QuickFinder, find the person or anyone to whom they are related. If you found
the person you were looking for hit Ctrl-D for the Dialup dialog. If you found
a relation, e.g. the employer, hit tab, down arrow until you find the
person, then Ctrl-D.
- Use In/Out in a shared office environment with
multiple companies?
There is a
Technical Note on this issue on the web site. If the installation on every
workstation is new, or you have deleted ziata.ini from the Windows95/NT root
directory of every machine, the easiest method is to: 1) give all users from
all companies read/write access to a common drive (this drive will contain the
Network Control files and the In/Out files); 2). perform one Server
Installation and remaining Workstation installation for all computers; however:
a) each company should indicate a Server Directory unique to that company; and
b) each workstation, regardless of company, should change the NCD on the
Advanced tab to the shared common drive, and should check the "In/Out will
be used by different companies..." checkbox. See Section 3.
- Enable main menu items which appear disabled?
That depends. If
you are in your 30 day trial period, the only reason a menu might be turned off
is because the function is disabled while in beta testing. The web site will
indicate any modules currently turned off during beta. After the 30 day period,
you need to register the modules you want to use.
- Add someone to my WatchList?
Ctrl-I for In/Out.
(Make sure Watching is turned on from the Configuration Tab.) User Listing tab.
Double click on person to be added. See Section 2.d.iii. You must be running
In/Out to get WatchList notices.
- Create or delete a client?
QuickFinder, find
entity. Alt-Edit-Create Client/Delete Client. If already a client, the menu
will indicate "Delete Client" otherwise it will indicate "Create
Client." See Section 2.e.
You can register
and/or upgrade your modules and network licenses immediately by obtaining a new
access code from our sales representative. In other words, if you want to
register or if you need an additional network license, you can contact our
office, talk to a sales representative, obtain a new user access code, type it
in (from the Administration menu), and be immediately upgraded.

Contact Zegarelli
International at 412-765-0490, register@zegarelli.com, http://www.zegarelli.com/ziata, 1100 Allegheny Building, 429 Forbes Avenue,
Pittsburgh, PA 15219-1616, USA. Fax: 412-765-0531. New versions will be posted
on our web site for downloading.
1. User Registration. The shareware version comes fully enabled with a
network license for 100 user. To register Ziata! as a user, contact us,
preferably by telephone. You will receive a new access code and you will be
immediately registered. As a registered user, you will receive notification of
additional products and will have access to bug fixes, etc. The trailer at the
end of messages will be eliminated, as will the login confirmation.
2. Distributor Registration. You can become a distributor of Ziata!. A distributor
will receive an original version of Ziata! which bears a unique identification
code identifying the distributor. The distributor can then distribute their
version of Ziata! which bears their identification code. When User
Registrations are performed based upon the software distributed by the
Distributor, the Distributor gets a royalty (the Distributor ID is provided by
the User at User Registration time). In addition, the Distributor provides
information about the Distributor's business, as a marketing tool, in the About
Distributor box. Consultants recommending Ziata! would be behooved to become
Distributors. Call for details on the Distributor package, and see the
separately enclosed distributor documents. See the Distributor-related
documents in the Ziata! program folder.
- Enjoy -
